As always, here’s the video guide:
Today we're going to show you how to make an online store with an awesome, sleek design.
We're also going to show you how to create your very own products to populate your site.
Think of us as your spirit guide through this tutorial where I'm gonna show you step by step what to do to come out of this with an awesome ecommerce website.
Contents
Step #1: Secure Domain Name and Web Hosting
All right, step number one is to secure a domain name and web hosting
To do this, just follow this link to hostgator.com.
It’s my special link just for readers of this blog.
Normally, Hostgator is about $12 or $13 dollars a year but I partnered up with Hostgator and got an awesome discount for you.
I actually use them for all of my websites. I'm not gonna pitch you anything that I don't actually use myself.
They are quick, easy, and affordable, and they also have great customer service.
Once we're on this page you'll see the hatchling plan, the baby plan, and the business plan.
The baby plan is best if you have multiple domains.
The business plan is best for if you're pulling in a lot of money with your website.
But we're gonna go ahead and select the hatchling plan.
After that, you’ll see the page where you can enter your domain name.
Go ahead and enter your domain name and if you already have a domain name you can just click on “I already own this domain.”
Anyway, I decided to use my last name, which is often used for luxury ecommerce brands.
Unfortunately, my last name is taken.
You’ll see in the image above it’s unavailable and it’ll suggest other domains like .club.
I highly recommend sticking with a .com if you can. It legitimizes your website and a lot of people don't think to type in .site or really anything other than .com, .gov, .org, or .net.
So my solution today is to simply switch around a few letters in my last name and make it Mcmasun instead.
After choosing your domain name and getting that .com (if you can), you want to make sure that “privacy protection” is checked
I highly highly recommend doing this.
I did not do this on the first website that I ever bought and my phone got bombarded with solicitors trying to sign me up for their plan to design my website and all this other nonsense.
I was getting literally 10 phone calls a day.
It was awful
The privacy protection is only $1.25 extra a month so there’s no good reason NOT to get it.
After that, you’re gonna scroll down to choose a hosting plan.
So the more months that you purchase for the lower the price will be.
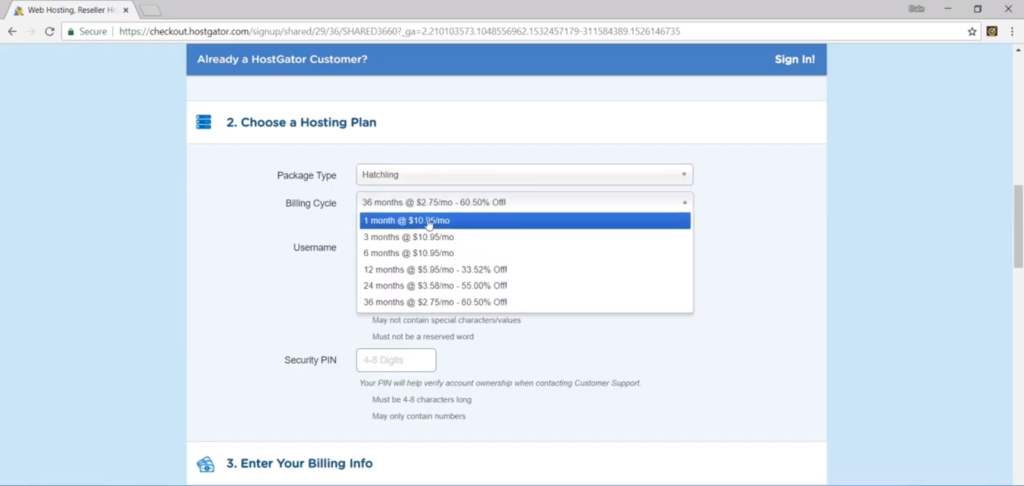
You can see $2.75 a month for 36 months, versus one month which is $10.95.
At the time of this writing, you’re saving about 60% depending on which one the plans you pick.
I recommend going with the twelve months because you're buying your domain name for twelve months so you might as well buy your hosting plan for twelve months, too.
Then again, if you want to maximize savings and you know your website is in it for the long haul, then commit to the 36-month plan.
Now, you’ll need to create a username.
I just used my name and entered in a simple in.
After that, you’ll enter in your billing info.
Once that’s complete, you’ll scroll down and see “add additional services.”
The top one tells you that you can assure safety to your visitors by including a free SSL certificate.
I highly recommend this.
An SSL certificate is that little secure tab up on the top of your website pictured below.
It signals to visitors that your website is safe and that any information they enter on your website is safe, too.
But, you can down and uncheck “protect your site from hackers” and “get your professional email backup” and so on.
You don't need these things right now.
I have other videos on my site that show you how to get that stuff for free or find a better-paid service.
Once you’re ready to checkout, go down and enter the coupon code: createaprowebsite.
Full disclosure:
This coupon code gets me a commission which helps fund these free tutorials and videos that I put out. So if you want to support (and get a sweet deal), simply using my coupon code is the best way to do it.
Once that’s done, agree to terms of service and click checkout.
Then you’ll be in the Hostgator customer portal, also called the cPanel.
Then go to the hosting tab and confirm that your hosting account is on your new domain name.
Step #2: Setup and Install WordPress
Next, we need to install WordPress.
But some of you may be wondering…
What is WordPress?
WordPress is just a software that you use to design and publish your website or your blog.
It’s by far the most popular website builder on the market and it powers about 30% of the internet.
WordPress comes with over 11,000 different themes that you can choose for your website and also over 55,000 widgets and plugins to help you optimize the functionality and the tools on your website.
It’s also free and open source.
So there are tons of developers all over the world working on it every day to make it better.
How to Install WordPress
To install WordPress just go over to WordPress one-click installation in cPanel.
And now select your domain name. Don’t do anything in the field that says “directory”.
Just click next.
Now you’re going to give your site a title.
I’ll go with Mcmasun.
For the admin I'll put in my first and last name and the same email.
Then agree to the terms and click install.
After WordPress is finished installing, the first thing you want to do before anything else is to copy all of the information under “installation details.”
Put this info somewhere safe because you’ll need it later.
Now go ahead and click login.
You’ll be brought to a loading page. Hostgator is sending your domain out to the whole world so everyone can find it, and this process takes anywhere from 20 minutes to 2 hours.
I’ve never had it take any longer than 20 minutes.
Once it’s complete, you can check out the status of your website by typing in the URL, like mcmasun.com.
It should say something like “website coming soon.” That means the install and everything was successful.
So now you need to login to your new WordPress powered website.
To do that, type your domain’s URL and after type /wp-admin.
See the pic below for an example.
After typing that in, click enter.
Now you’ll see the login page.
You’re going to need to pull out that crazy long password and username you saved earlier to log in.
BAM! And you’re in.
You’ll see the WordPress dashboard.
Step #3: Reset WordPress Password
Step #3 is to reset your WordPress password.
This is an important step because you don't want to use that ridiculous password that you had to save from earlier every single time.
You want to create something that you can remember.
In order to do this just go down to users and click on your name and scroll all the way down to the bottom of the page and you can see “new password.”
Click “generate password.”
Delete that ridiculously long one that they give you and replace it with one you’ll remember.
Then click on update profile.
Step #4: Active a New Theme and Page Builder
Step #4 is to activate a new theme and page builder.
Real quick, I want to explain the difference between the two because some people get them confused.
What is the Difference Between a Theme and a Page Builder?
A theme is usually just what determines the look and the style of your website, but in this case, we're using a page builder to edit this homepage.
So really, the theme that we're gonna get is strictly just for the header – which is the whole white at the top of the page.
The builder builds all of the content below it, all the way down to the footer.
Activate WordPress Theme
So we're going to be using a free theme called ocean WP.
To get this theme, go over to appearance and click on themes.
Then click the big plus button to add a new theme.
To quickly find OceanWP in the sea of other themes, just type it into the search bar.
Sidenote:
If you would like to use a paid theme – and they do have a lot of advantages – then check out my video on the top 10 best and responsive WordPress themes.
The one I recommend most highly is called Divi.
Anyway, I spent days combing through free themes and testing them out for this ecommerce tutorial only to find out that there weren’t any good free themes out there that would give you the customization that I wanted you to have.
Which is why I used OceanWP and created a template that you can just download and use.
Install OceanWP
So first, just click install on the OceanWP theme.
Now it’s activated and you can see there will be a notice at the top highlighted by a yellow bar that says “this theme recommends the following plugins.”
One of those plugins is the page builder I’m going to show you how to use called Elementor.
Feel free to install the other plugins, too. They’re very useful.
Just click on “begin installing plugins” and it will install all three of them.
Then check all three and hit apply.
And if you want to install more plugins, or were missing the three pictured above, just go to plugins on the left side menu and click “add new.”
Step #5: Install WooCommerce
WooCommerce is just a plugin that allows you to create products and product categories, set prices, and do all the fun ecommerce stuff.
It's what adds the ecommerce functionality to your website.
So to plugins and click add new.
Type in the search bar WooCommerce.
Find WooCommerce and click “install now.”
Then click “activate.”
And now WooCommerce is installed and activated. Woo!
OK, next you’re going to click add new plugin again.
This time we’re going to activate Stripe.
Stripe is what allows people that enter their credit card information to pay for products.
I’m going to show you how to set up PayPal and Stripe so that people can pay any way they want.
To get Stripe, type into the search bar Stripe and you'll see WooCommerce Stripe Payment Gateway. Click install and activate.
Now I'm just going to go through the WooCommerce settings in order to show you everything that you need to configure.
So find WooCommerce on the left side menu and go to settings.
I’m going to walk you through all these different tabs.
First one is general.
Just put in your store address and then decide on what country or countries you’re selling to.
This is up to you, if you can only sell to specific countries or if you want to sell to all countries.
Same with shipping.
I would keep the default customer location as “geolocate.”
And make your decisions for the rest of the options here regarding taxes and coupons and preferred currency, etc.
When you’re done click Save Changes.
Cool, now we can go up to the tab labeled Products.
But the first thing we need to go over is our shop page which we don’t have yet. So let's go ahead and make one now.
Just find Pages on the left side menu and click add new.
Give your new page a simple title like Shop.
Now we're just gonna scroll down and make sure that our content layout in the ocean WP settings is at full width.
Great. Go ahead and click publish.
OK, so let’s go back to WooCommerce settings and return to the Products tab and select the newly create Shop page as our Shop Page.
We’ll be able to edit it later.
Then make sure that “Enable Ajax” is selected and “redirect to cart page” is not selected.
Under “Measurements,” you’re gonna put in how you want to weigh and measure your products.
And then enable reviews.
Enabling the star and review rating system lets your customers leave you awesome reviews (because I know your products are going to be awesome) which helps persuade other people to buy your products.
You could enable the “Show Verified Owner Label” option but I wouldn’t. It means only verified owners can leave reviews.
But in my experience, you just want regular customers to have the ability to leave reviews.
Then go all the way down and click “Save Changes.” Very important to always save your changes if they’re not saved automatically.
Now go the tax tab and fill out your tax info.
Now go up to Shipping Zone. Here you can add a shipping zone.
Next, go to Payments and determine how people will pay.
This is where I told you about PayPal and Stripe. We’re going to enable PayPal and we are also going to enable Stripe. And remember, Stripe allows people to pay with a credit card instead of using their PayPal account.
Once you’re done, click Save Changes.
Go up to the Accounts and Privacy tab, and this is where you can choose to allow guest checkout – meaning, people don’t have to create an account to buy your products.
You can also allow people to create accounts.
And you can set up your privacy policy. If you don’t know how to write a privacy policy, you can easily Google one for your industry.
You would just need to create a page for it and then select it here.
Step #6: Add New Pages
Step #6 is to add new pages.
In order to add these pages in, we're gonna have to create them.
Go to pages on the left side menu and select add new.
Title this one Cart. And what we need to do is add a small shortcode here that'll allow WooCommerce to put in some tools on the cart page for our customer.
Just type this:
[woocommerce_cart]
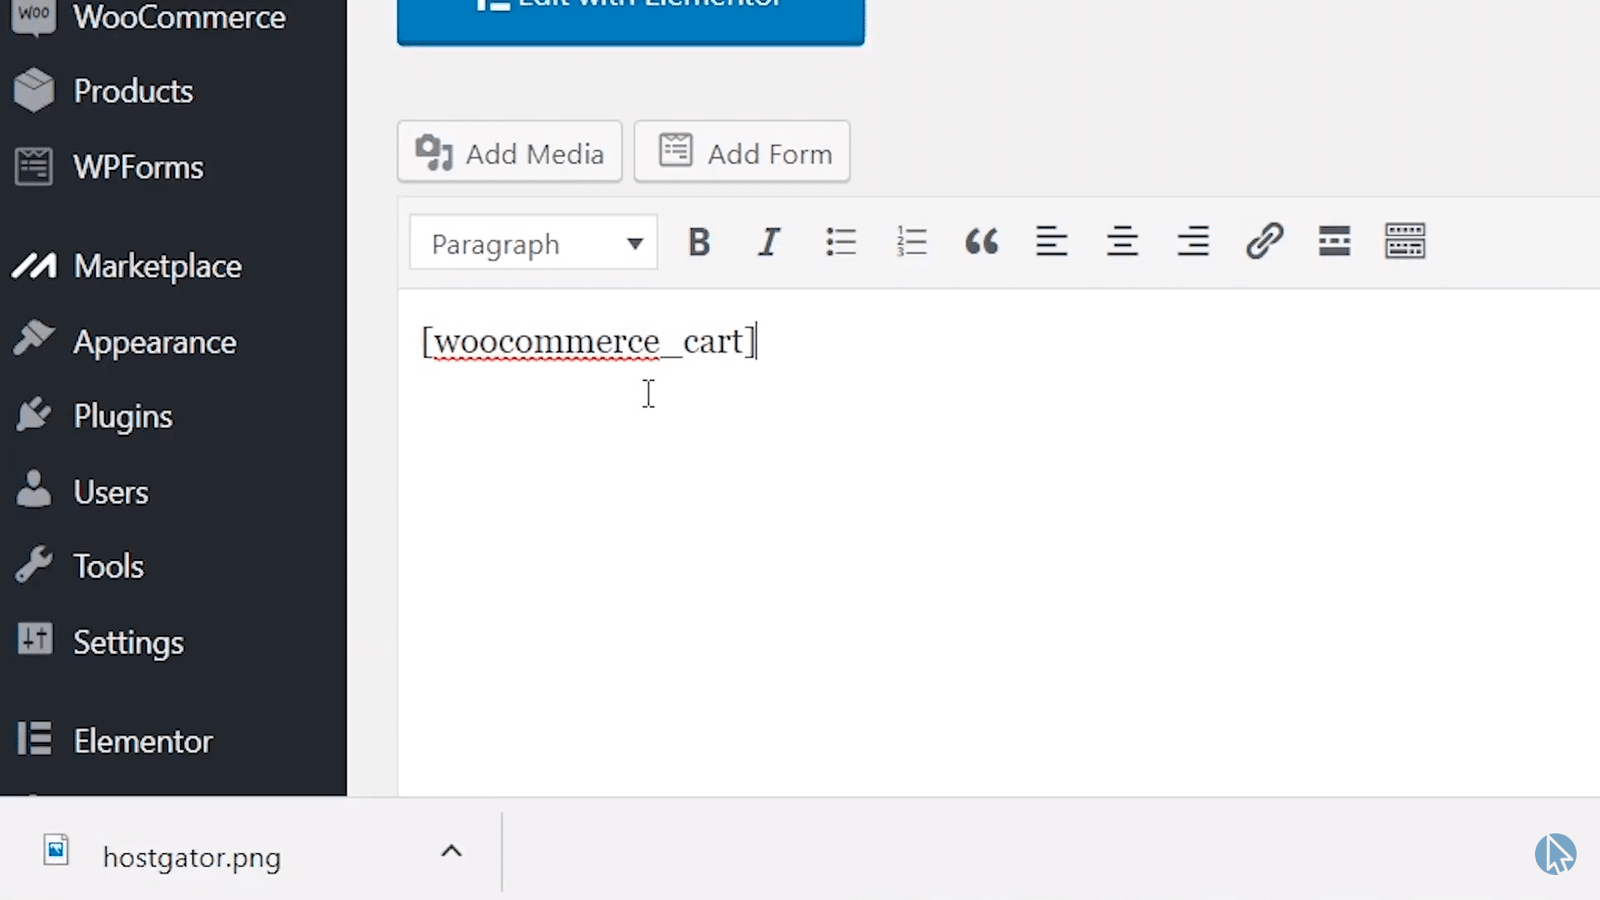
Pretty short and simple, right? Wouldn't really even call that coding.
Now just scroll down and change the content layout from default to full width.
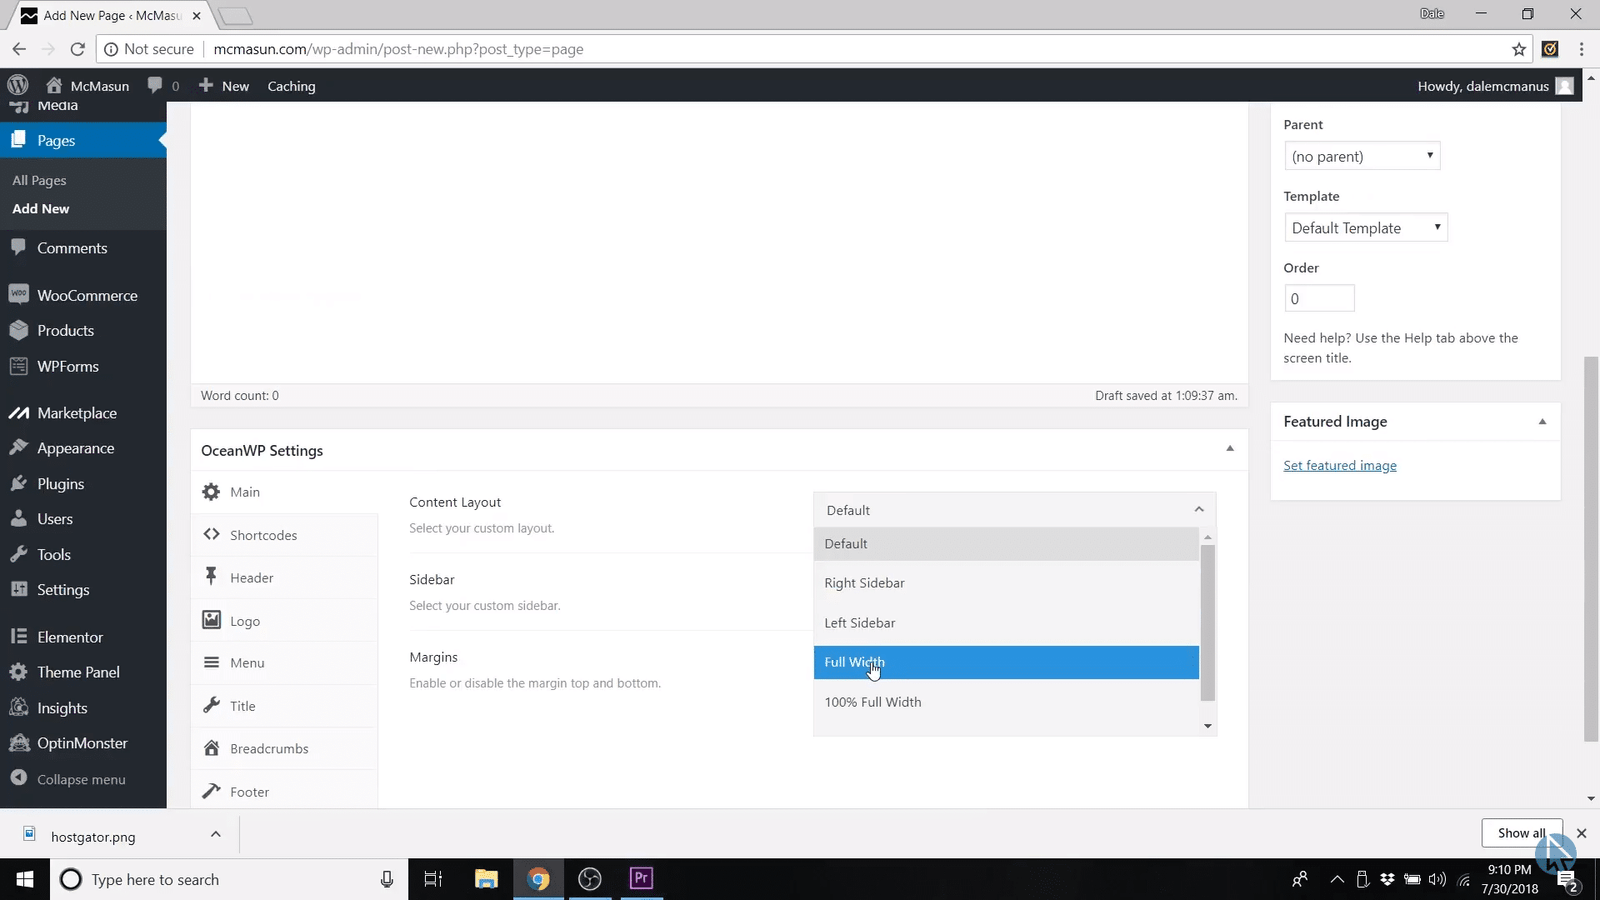
That’s super important, do not forget that.
Then scroll up and click Publish.
Now to Pages and press Add New again and title this one Account.
We're gonna add shortcode in, too. Just type in the following:
[woocommerce_my_account]
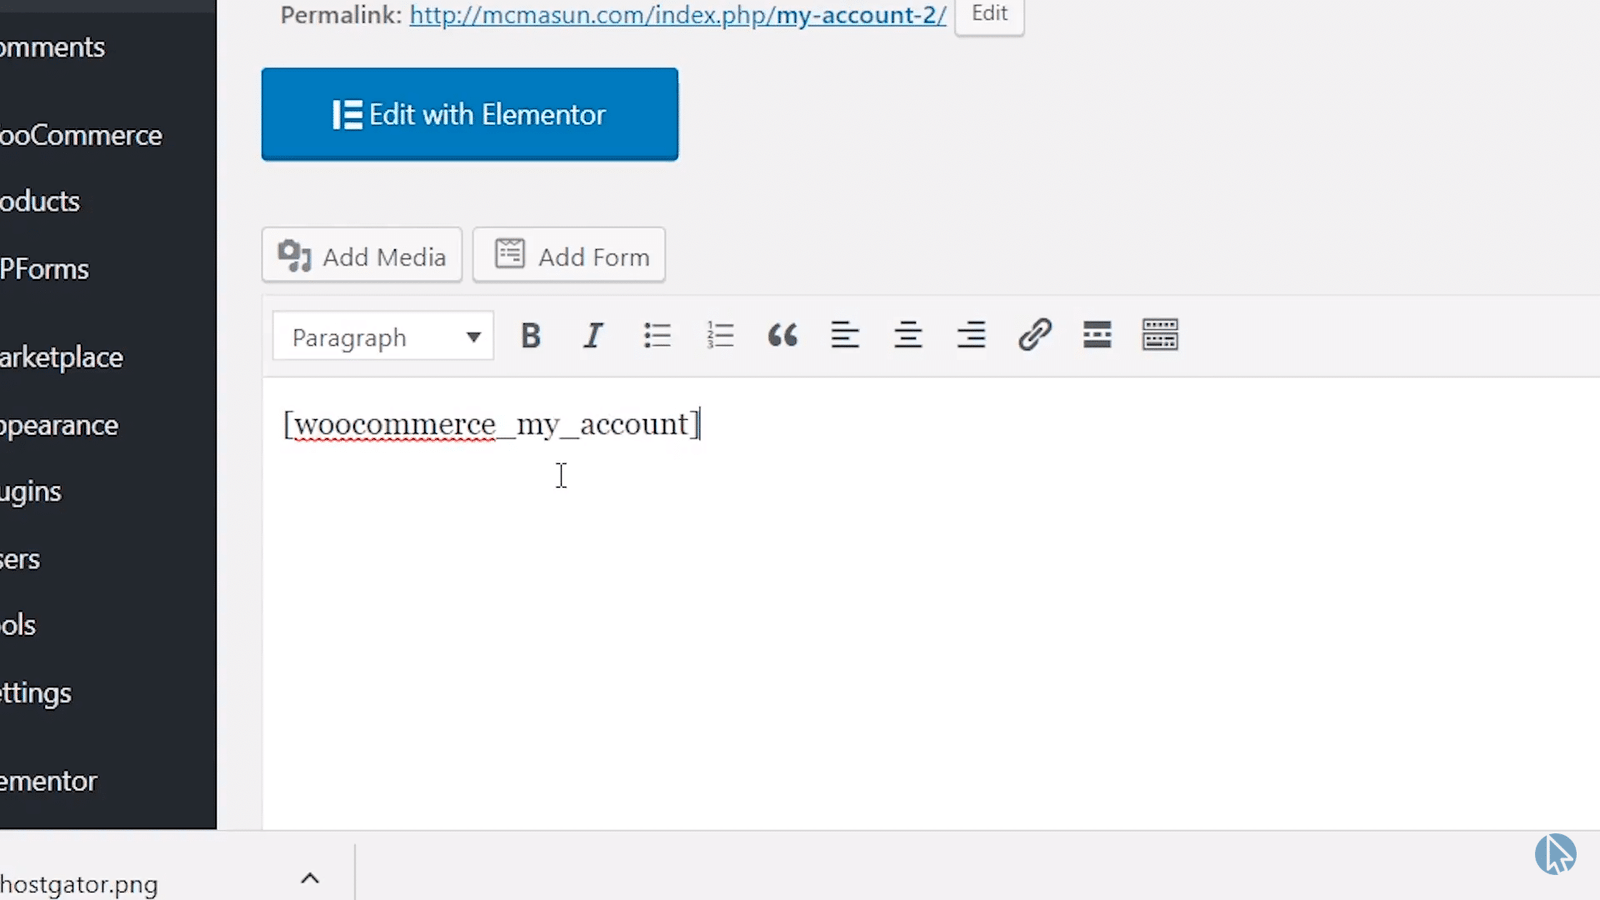
Now scroll down and make sure you change the content layout to full width. Then click Publish.
Add another page.
Title this Terms and Conditions.
We’re not going to get into this page in this tutorial, but it’s good to have it created for the future.
So then click Publish.
Add another page.
Title this one Privacy Policy. Click Publish.
Now go back to WooCommerce on the left side menu and go to settings.
Go to the Advanced tab.
Now you can put in the Cart page into Cart Page and so on.
Here, you can also force a secure checkout so they need that SSL certificate on their page to be able to check out but I'm gonna leave that unchecked.
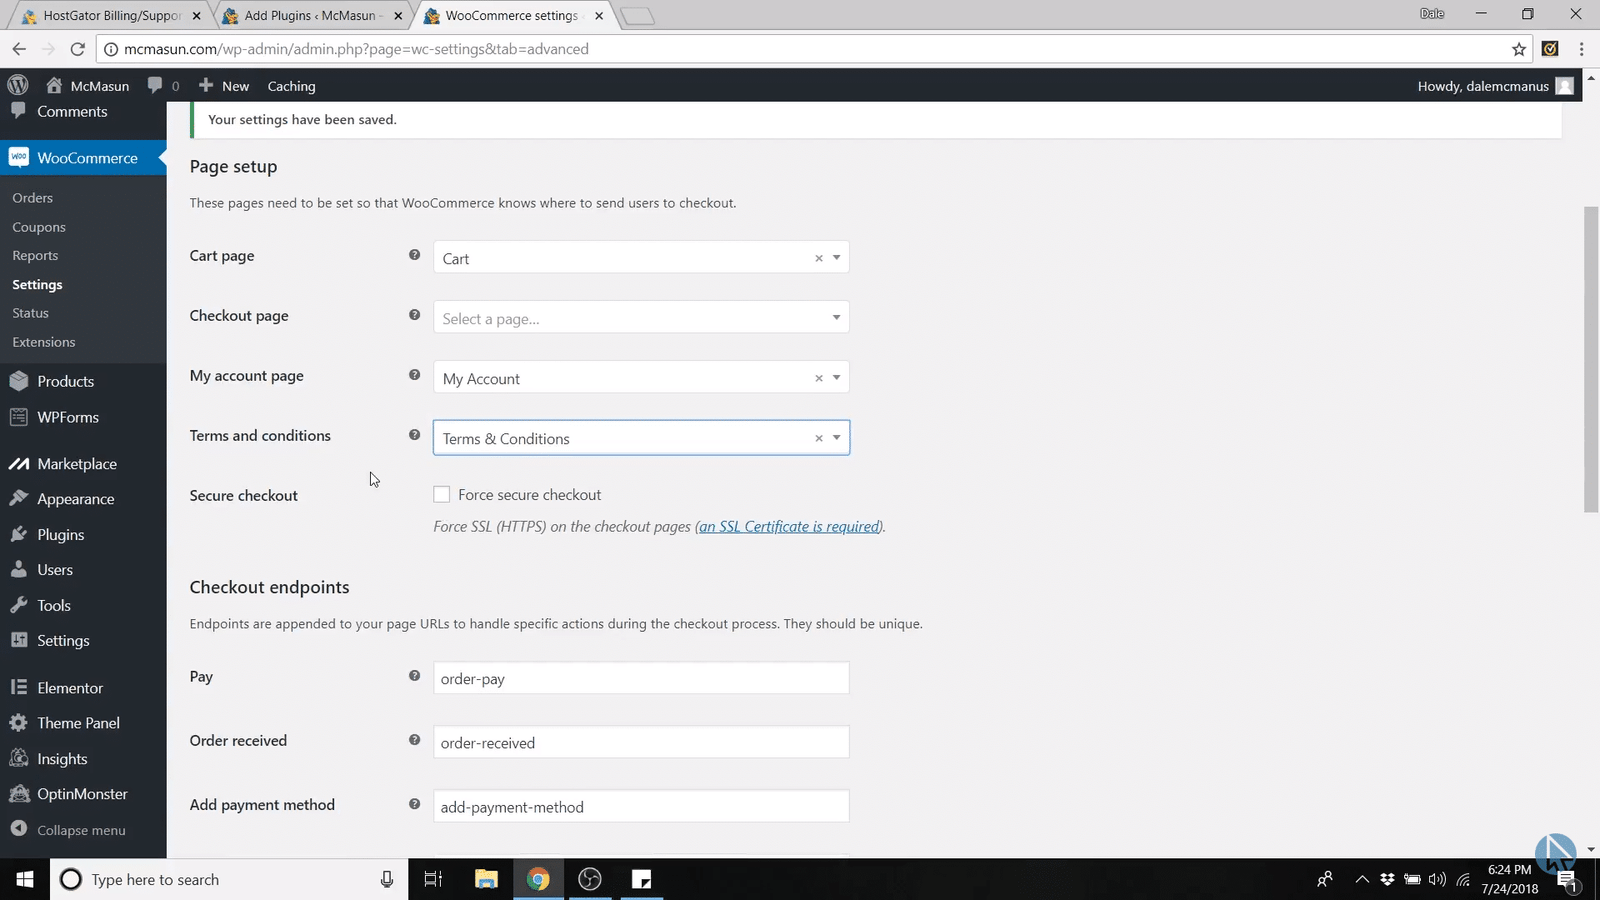
Scroll down and Save Changes.
Step #7: Customize Your Website
OK, we’re finally into the fun stuff!
Step #7 is about customizing your website to look and feel like a real ecommerce site.
But before we can customize a homepage, we have to make a homepage.
I’m sure you got this process down by now. Go to Pages and click Add New.
Call this page Homepage.
Scroll down and make it a full 100% width.
Then click “header” in OceanWP settings at the bottom there and disable the Display Top Bar.
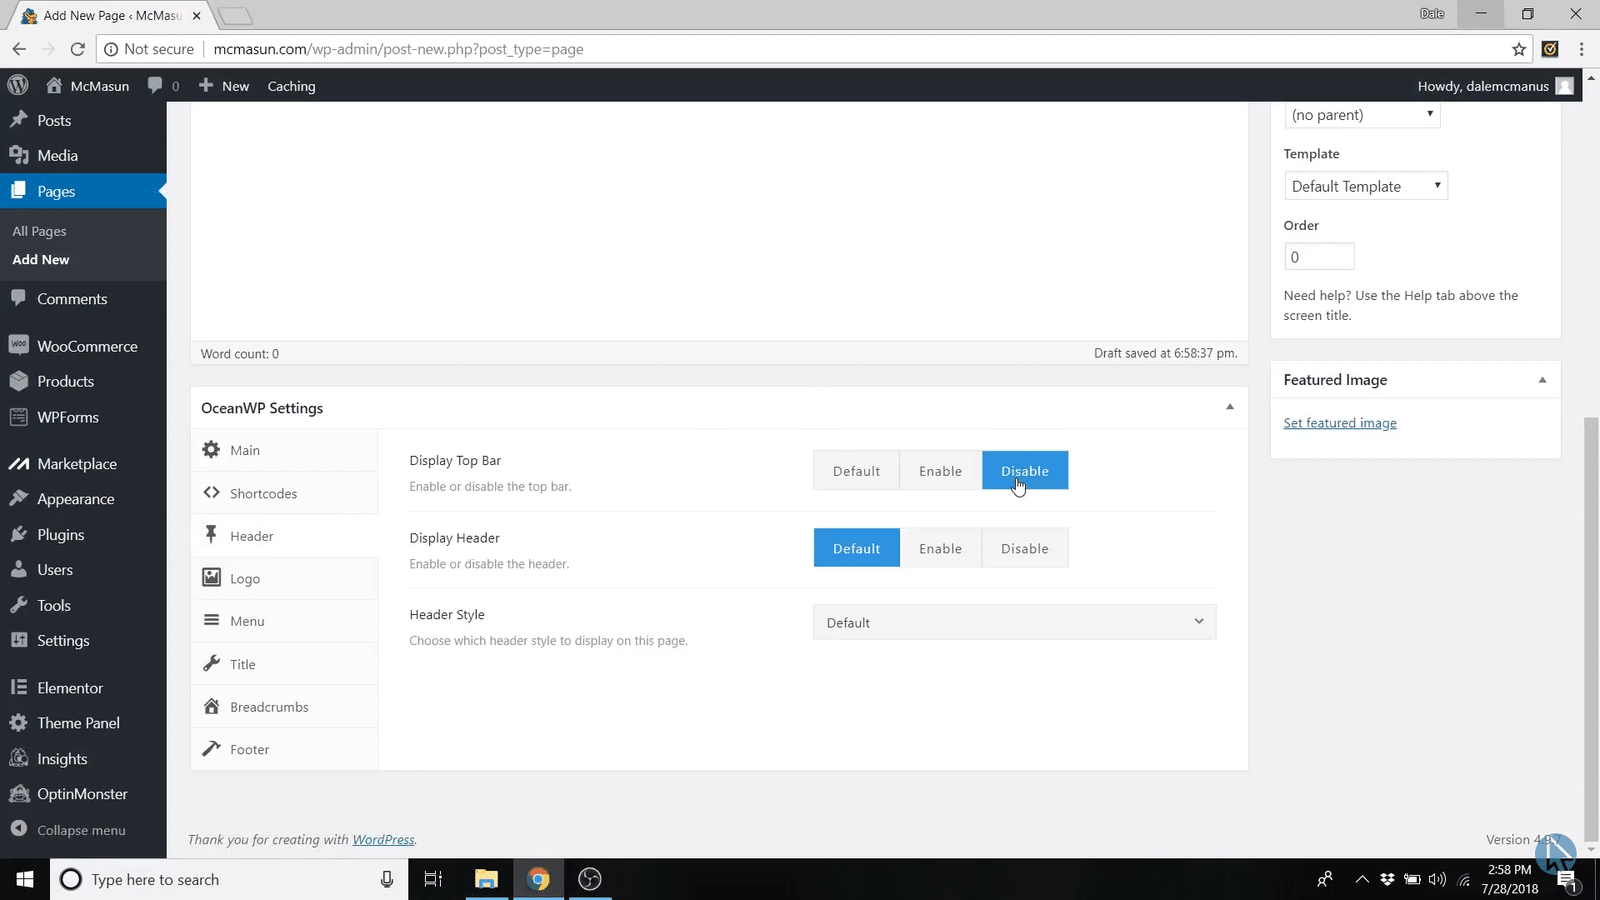
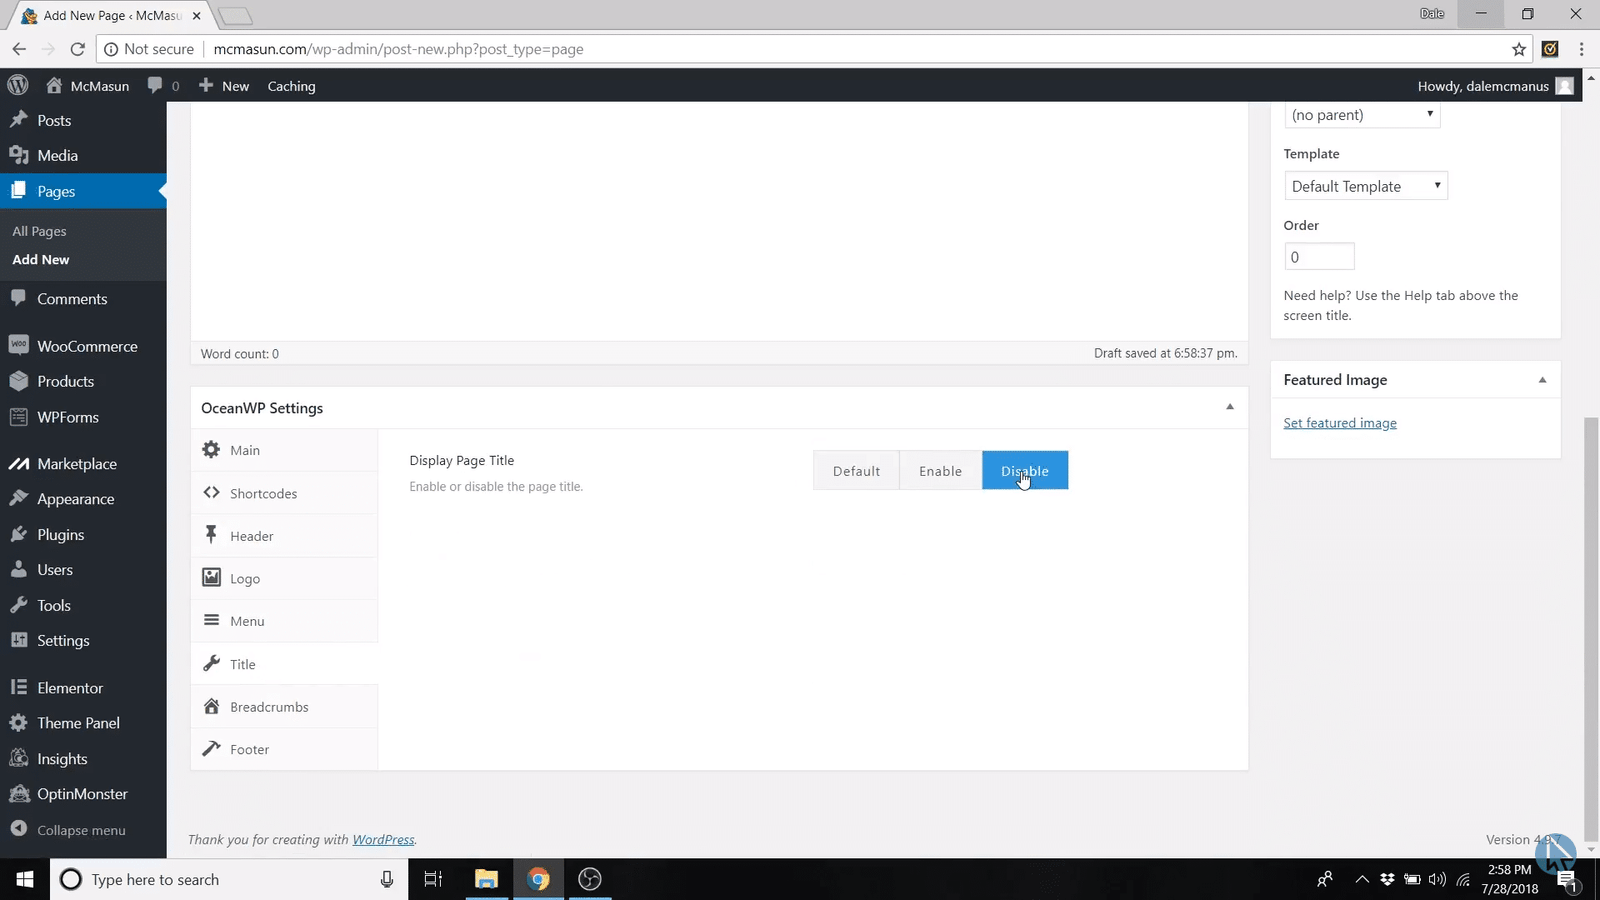
So now go up and press Publish.
Then find your sites name in the upper left corner of the WordPress dashboard, hover over it, and click “Visit Site.”
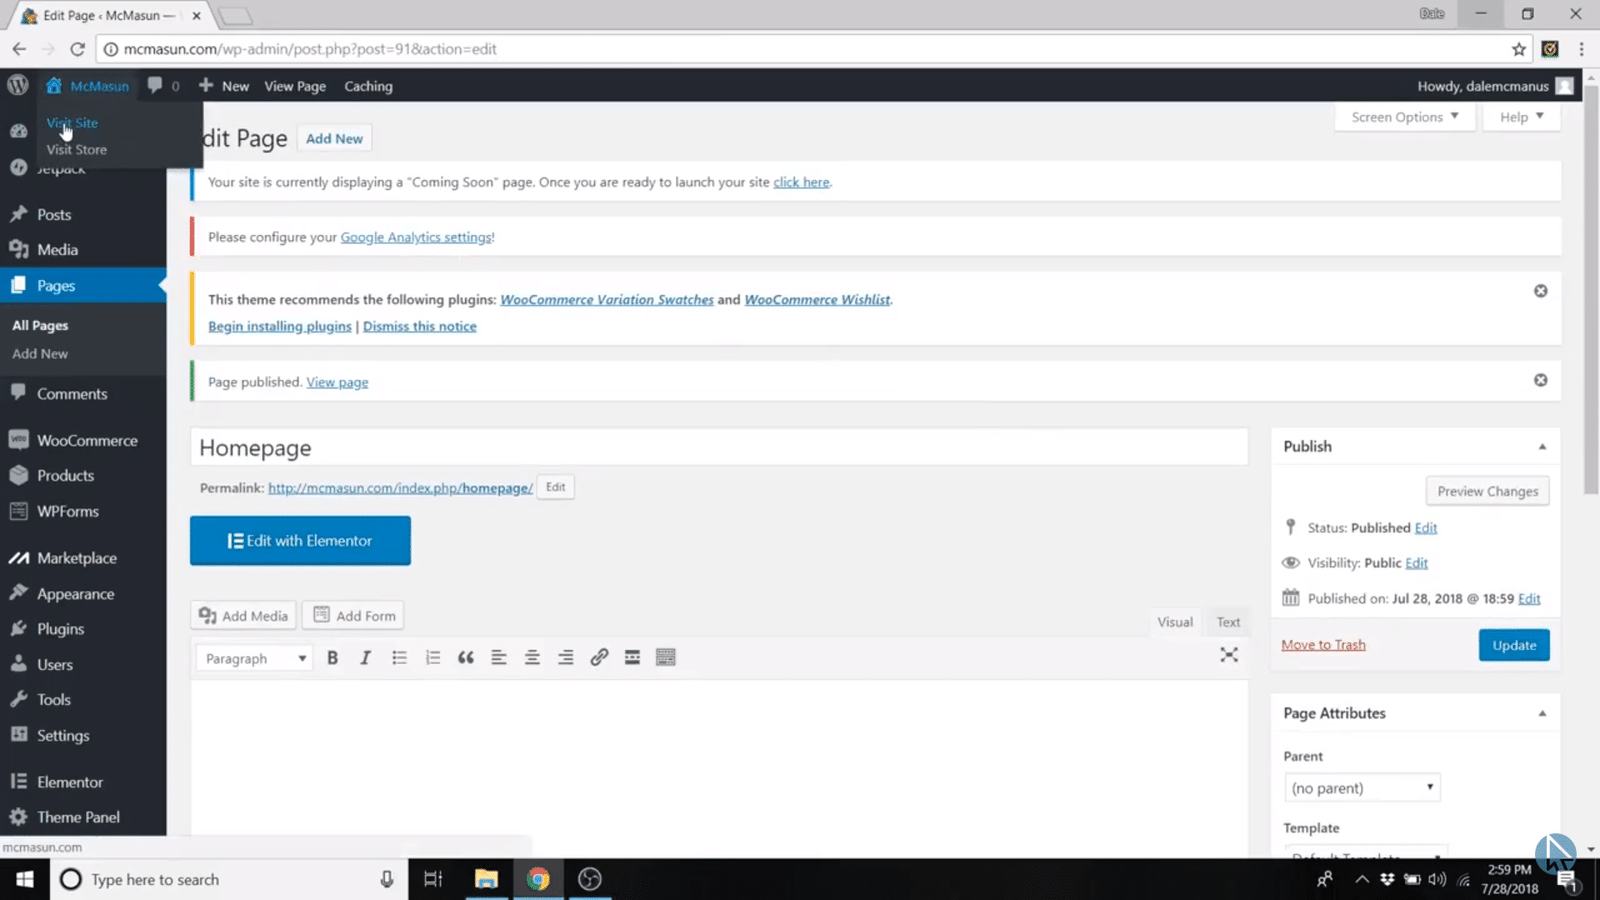
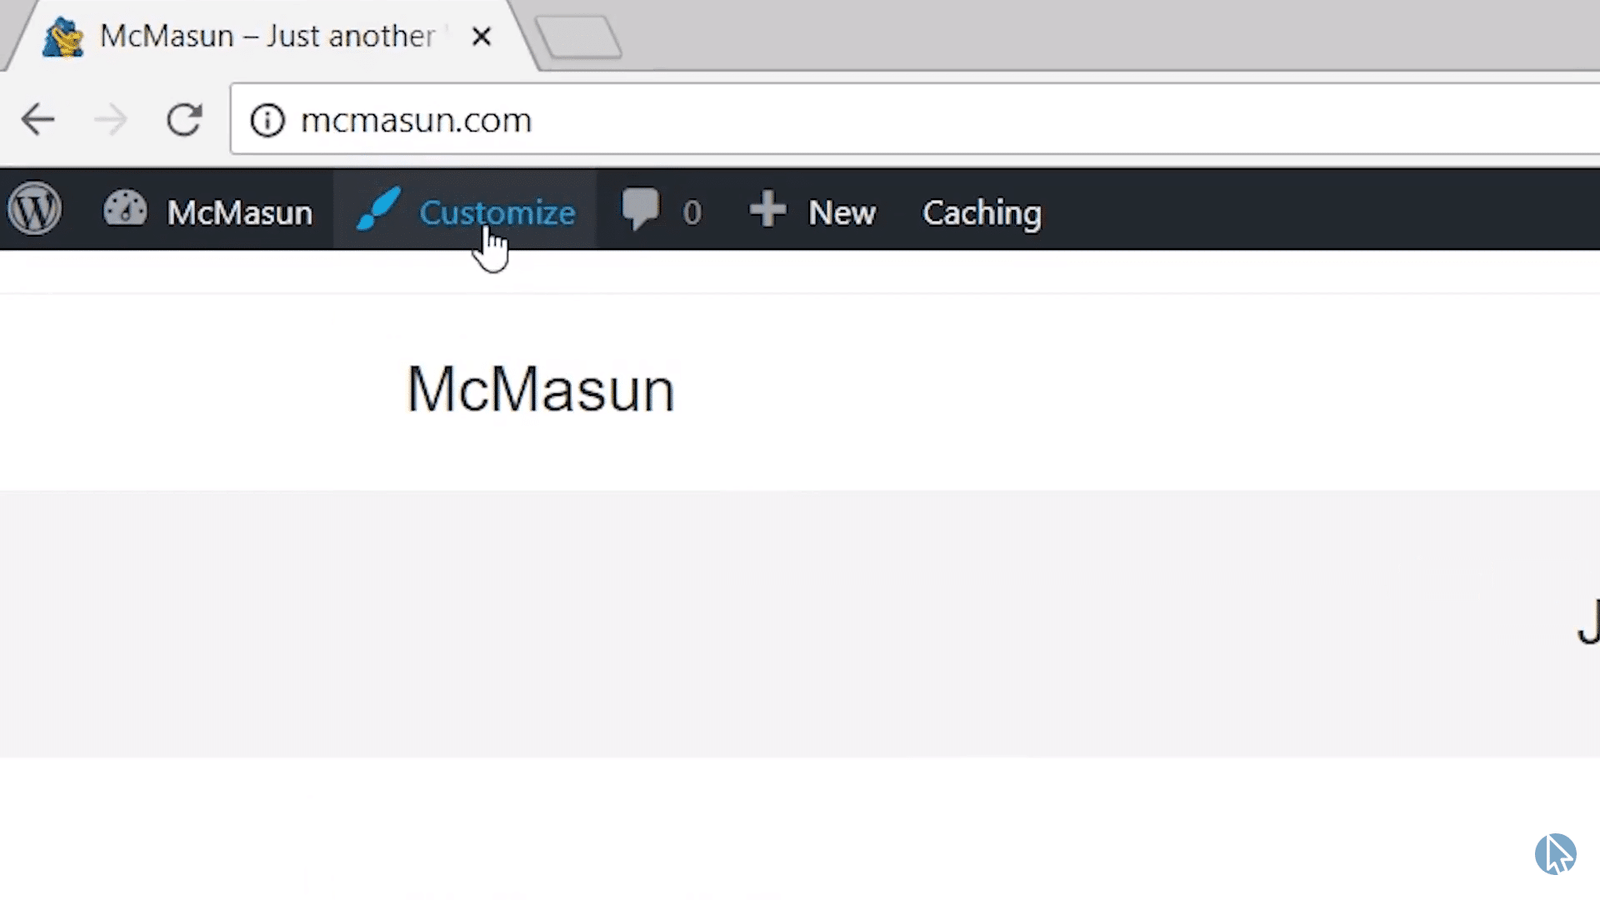
And then you’ll see the homepage of your site. WordPress automatically creates a basic page for you but we want it to reset to our new homepage. So click Customize on the top of the WordPress menu bar.
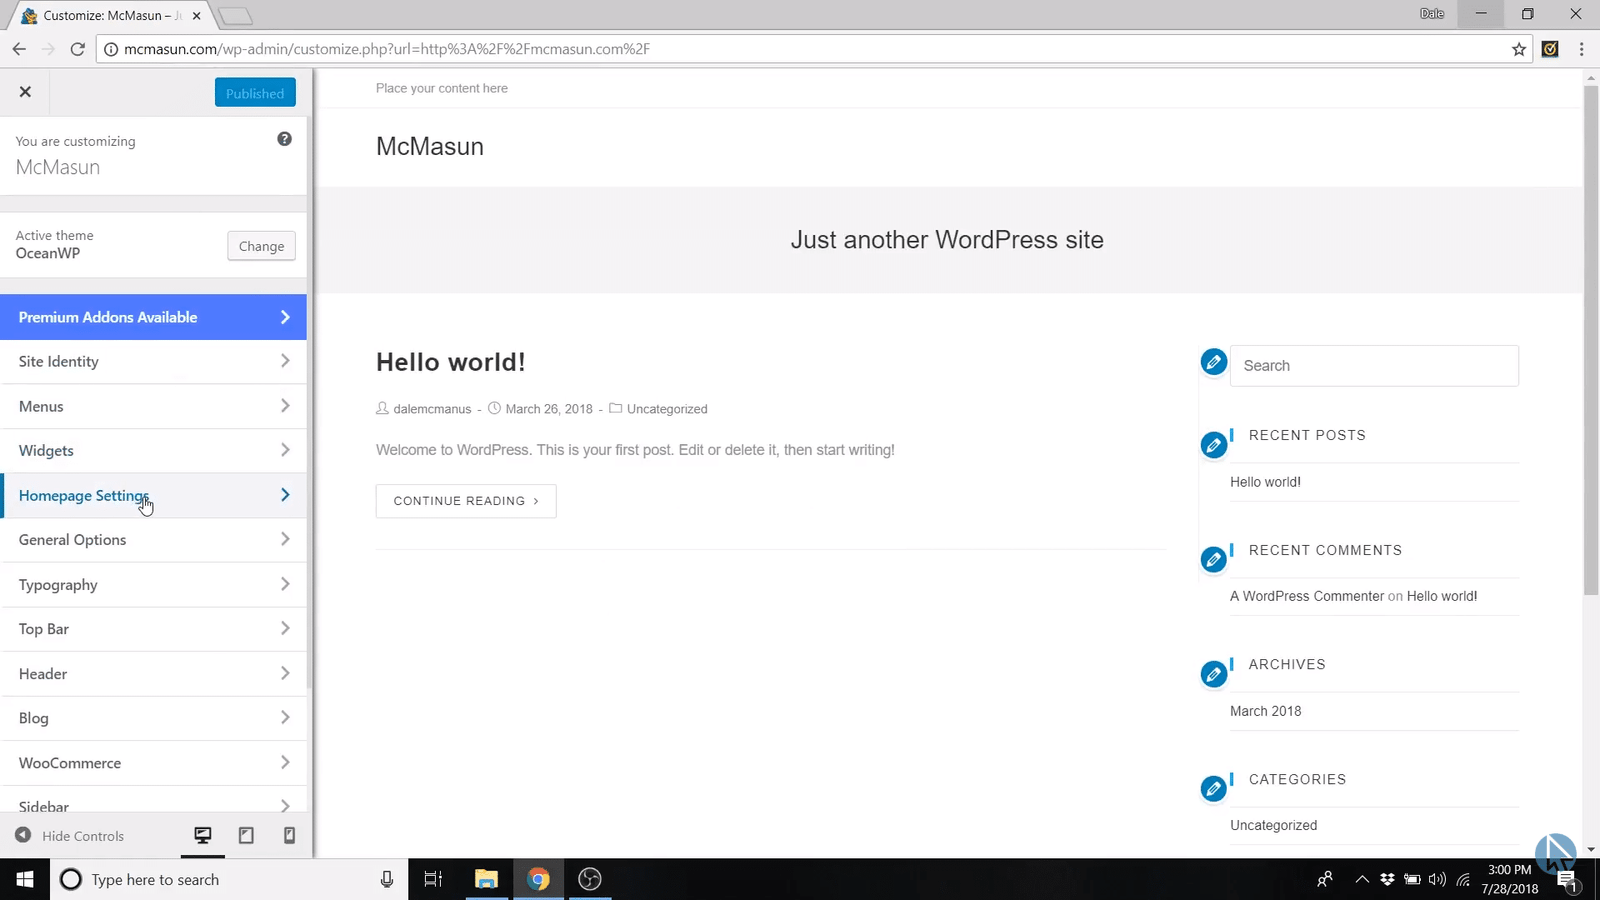
Now you’ll see the customizing menu on the left-hand side.
Click on Homepage Settings.
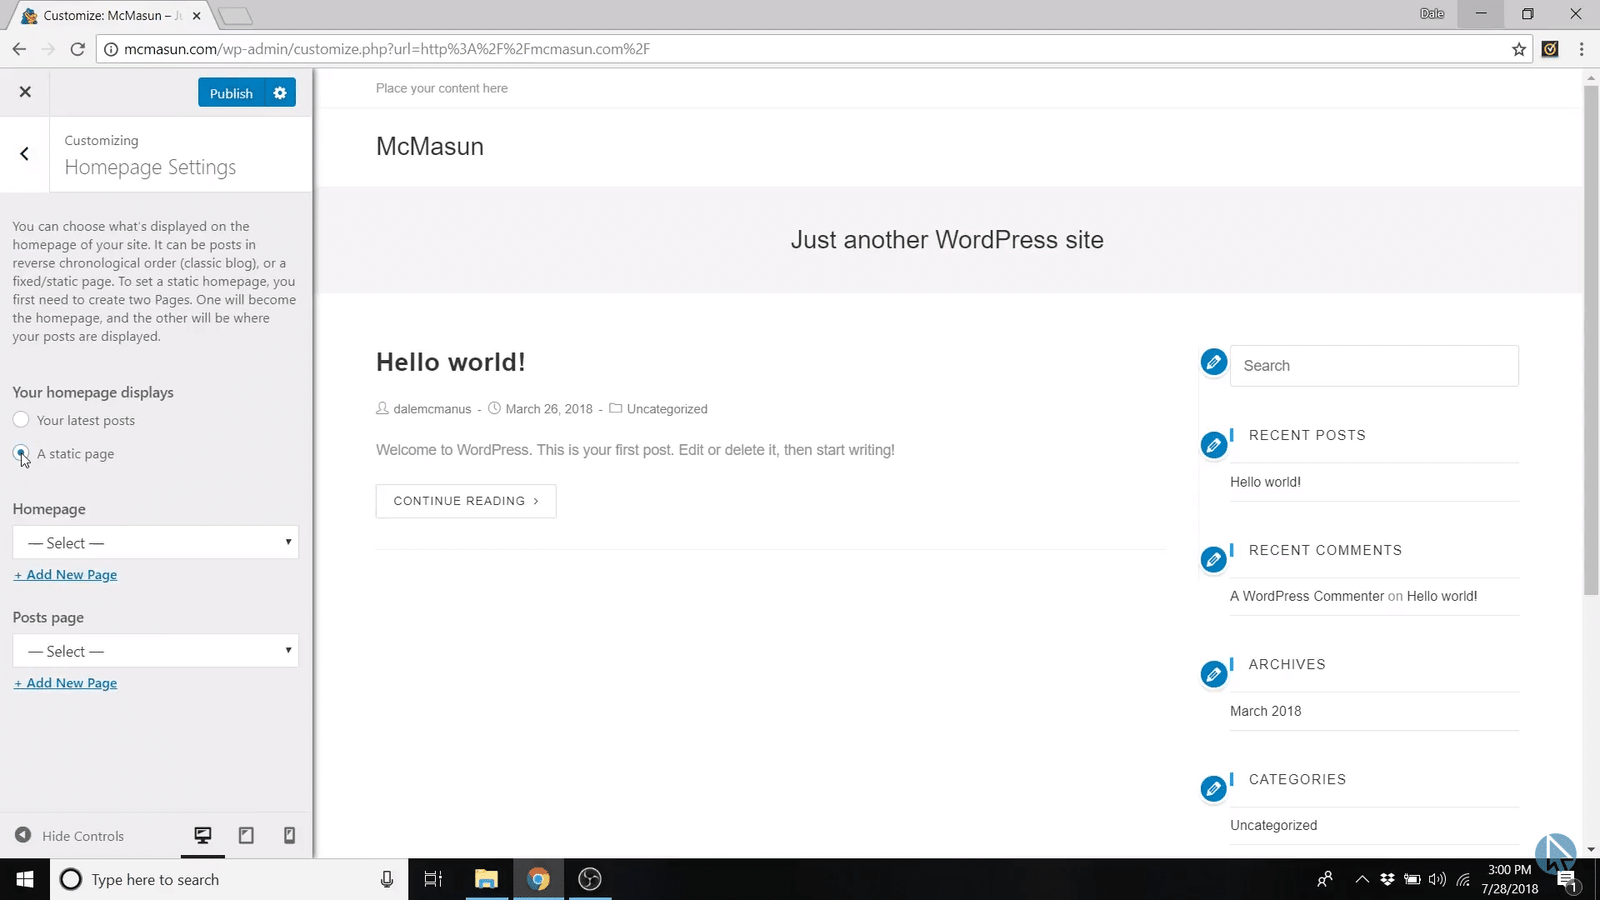
Tell it to be a static page.
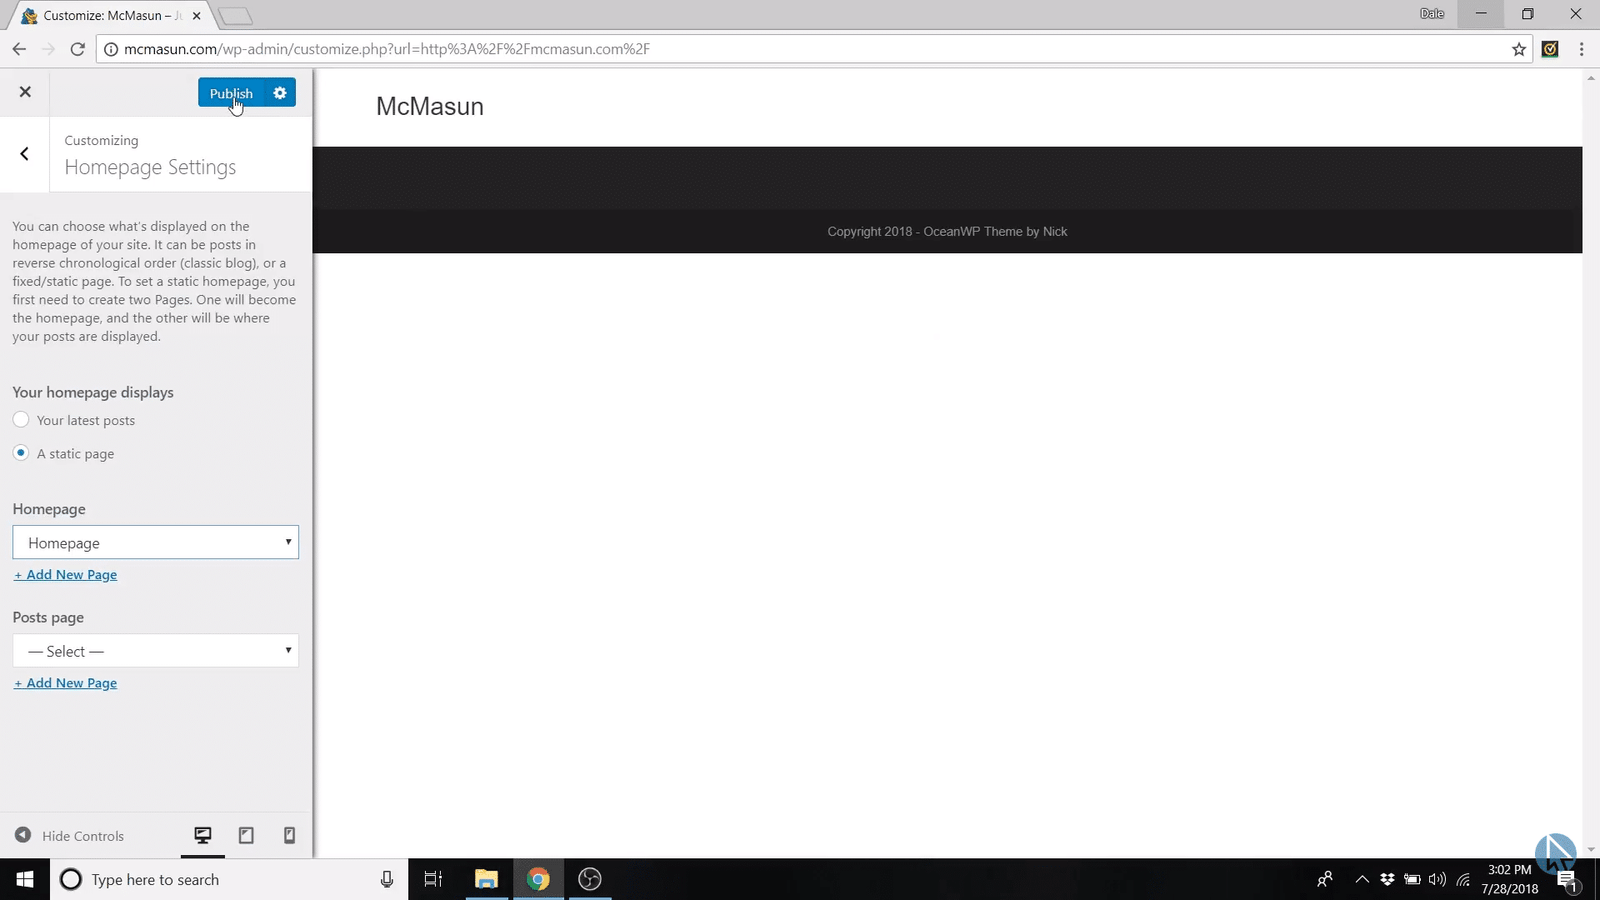
Underneath that, you’ll see “Homepage” with a drop-down menu. Go ahead and select “Homepage” from the options and click publish.
Install Elementor Page Builder
Now we need to start editing the page using Elementor.
But we need to install it first.
All you have to do is upload the template.
Here’s the link to the homepage and footer template.
And to upload them, click on the little X on the customize menu and go back to the WordPress dashboard.
Scroll down and find Elementor on the left side menu and go to My Templates.
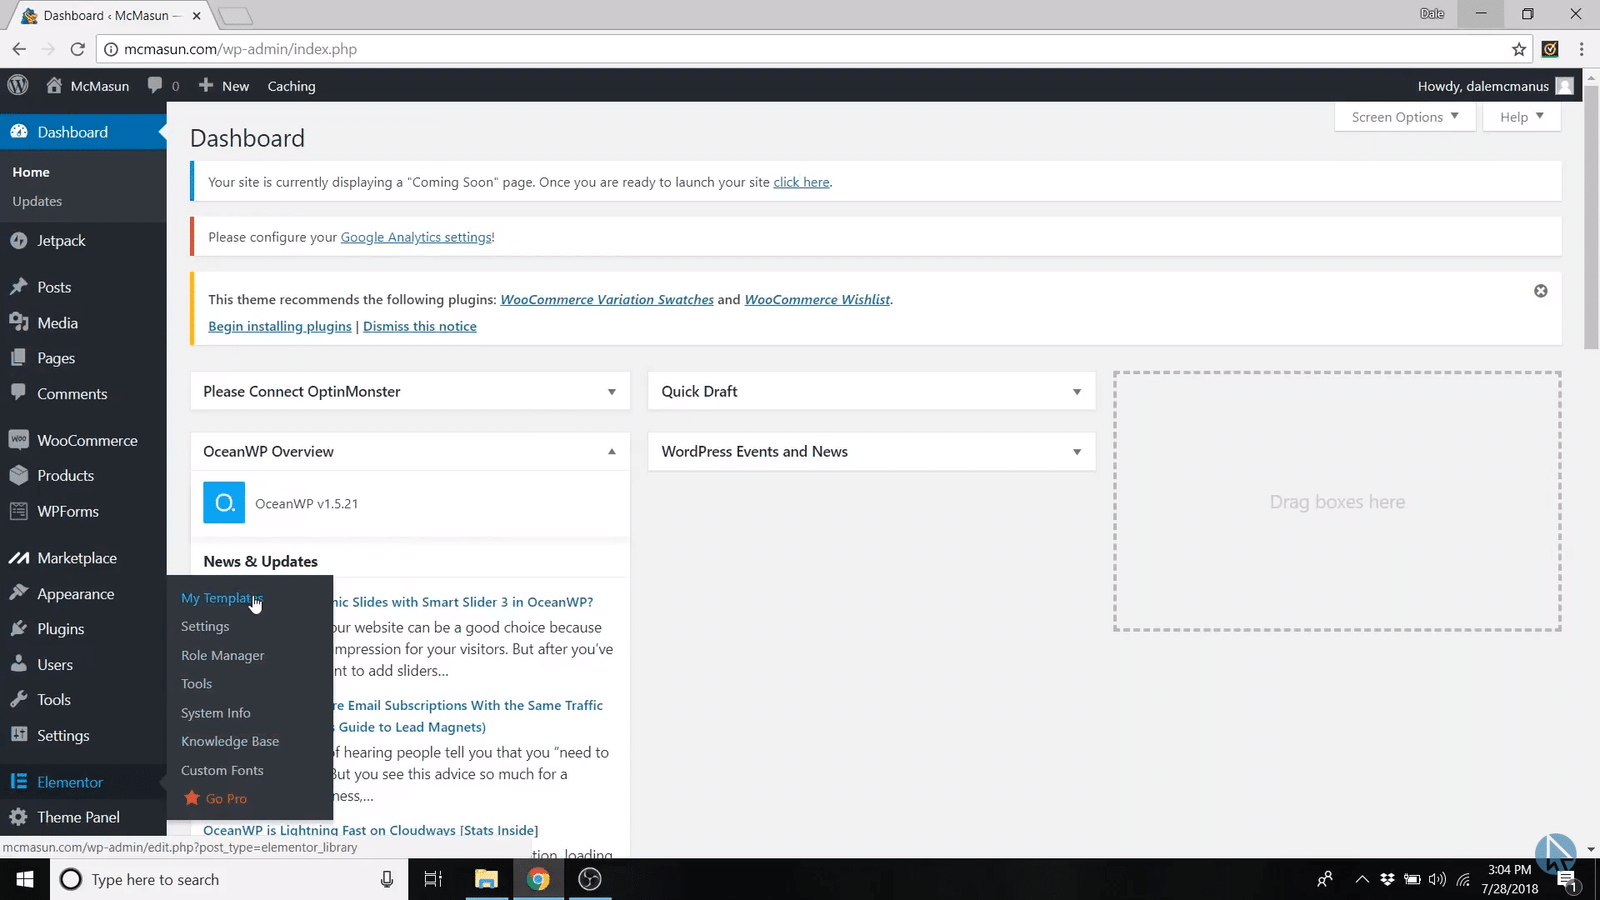
Click on import templates.
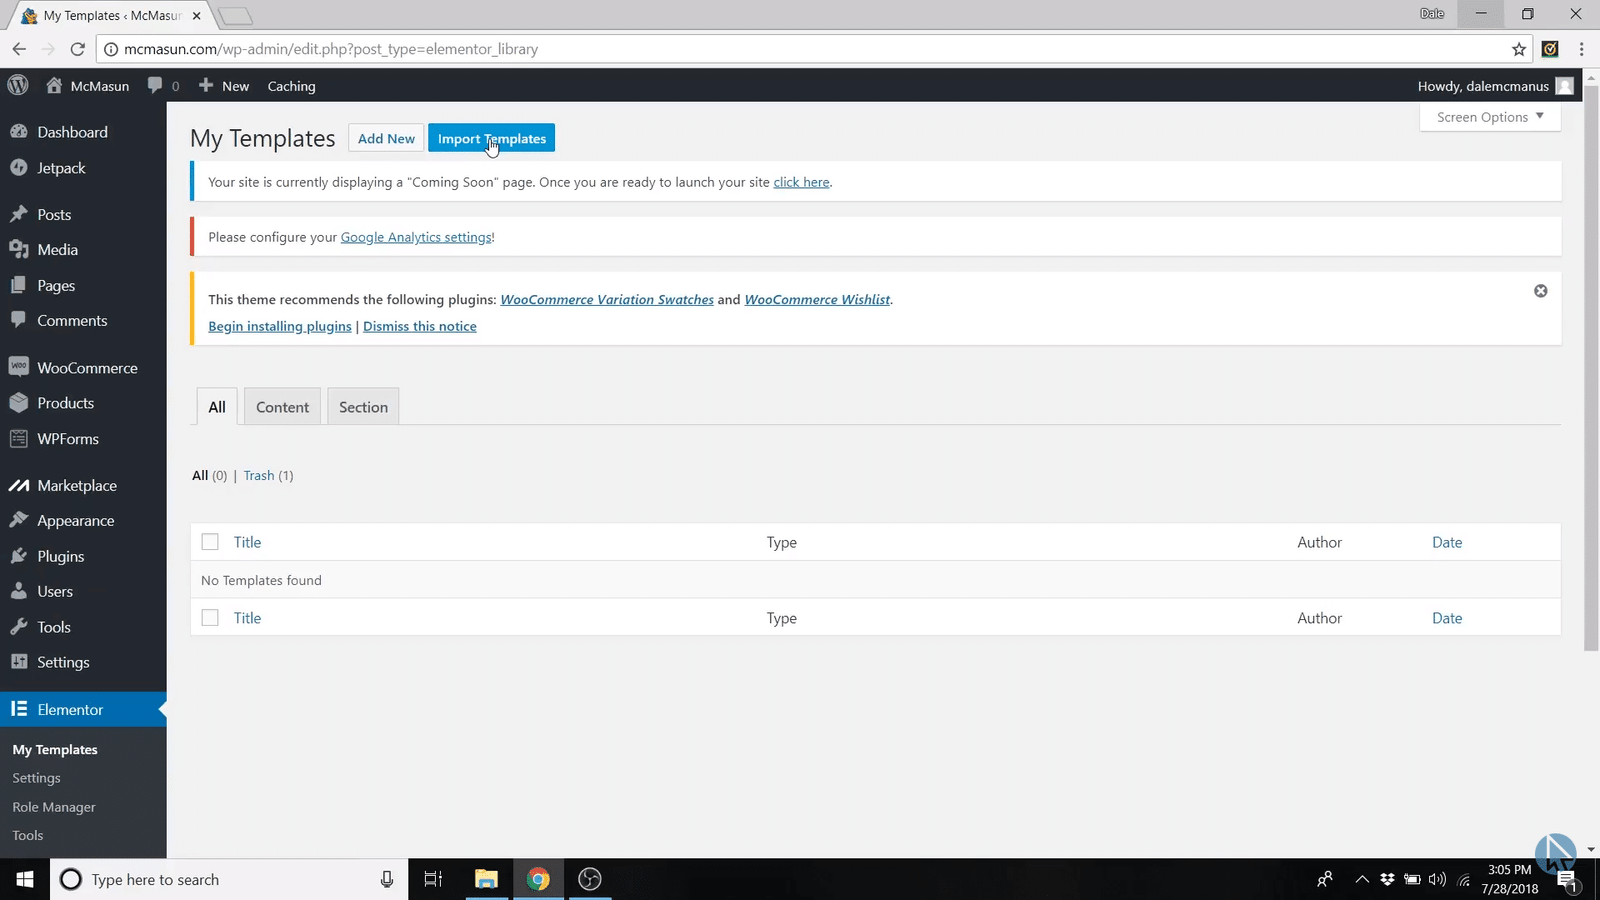
Then choose the files you downloaded.
Here they are again in case you missed them.
Open the files and import Homepage.
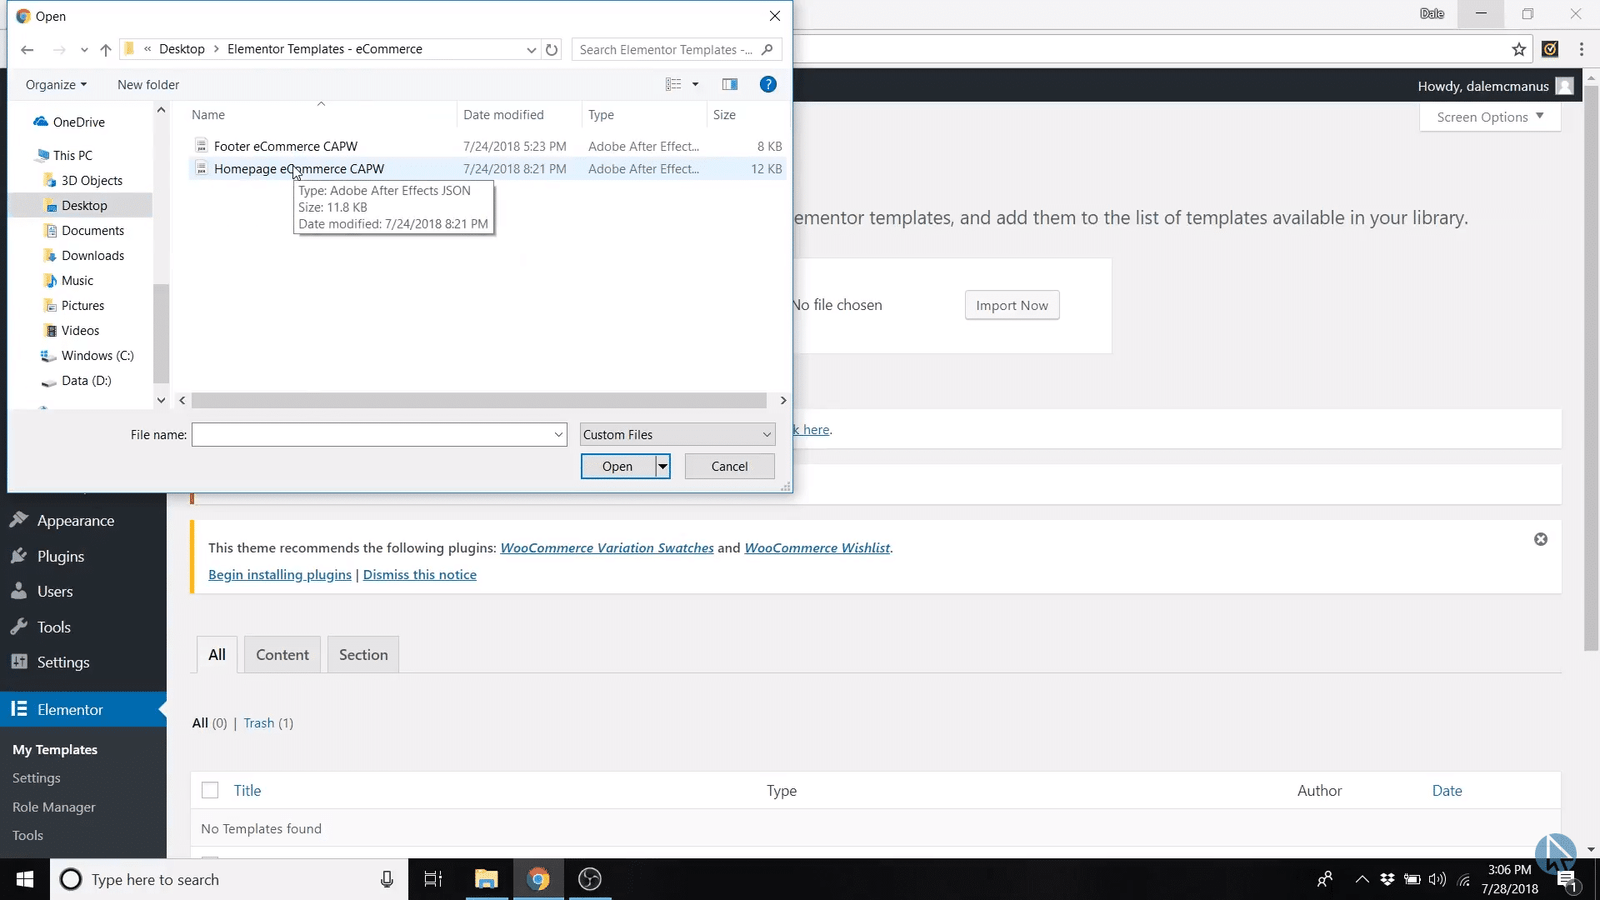
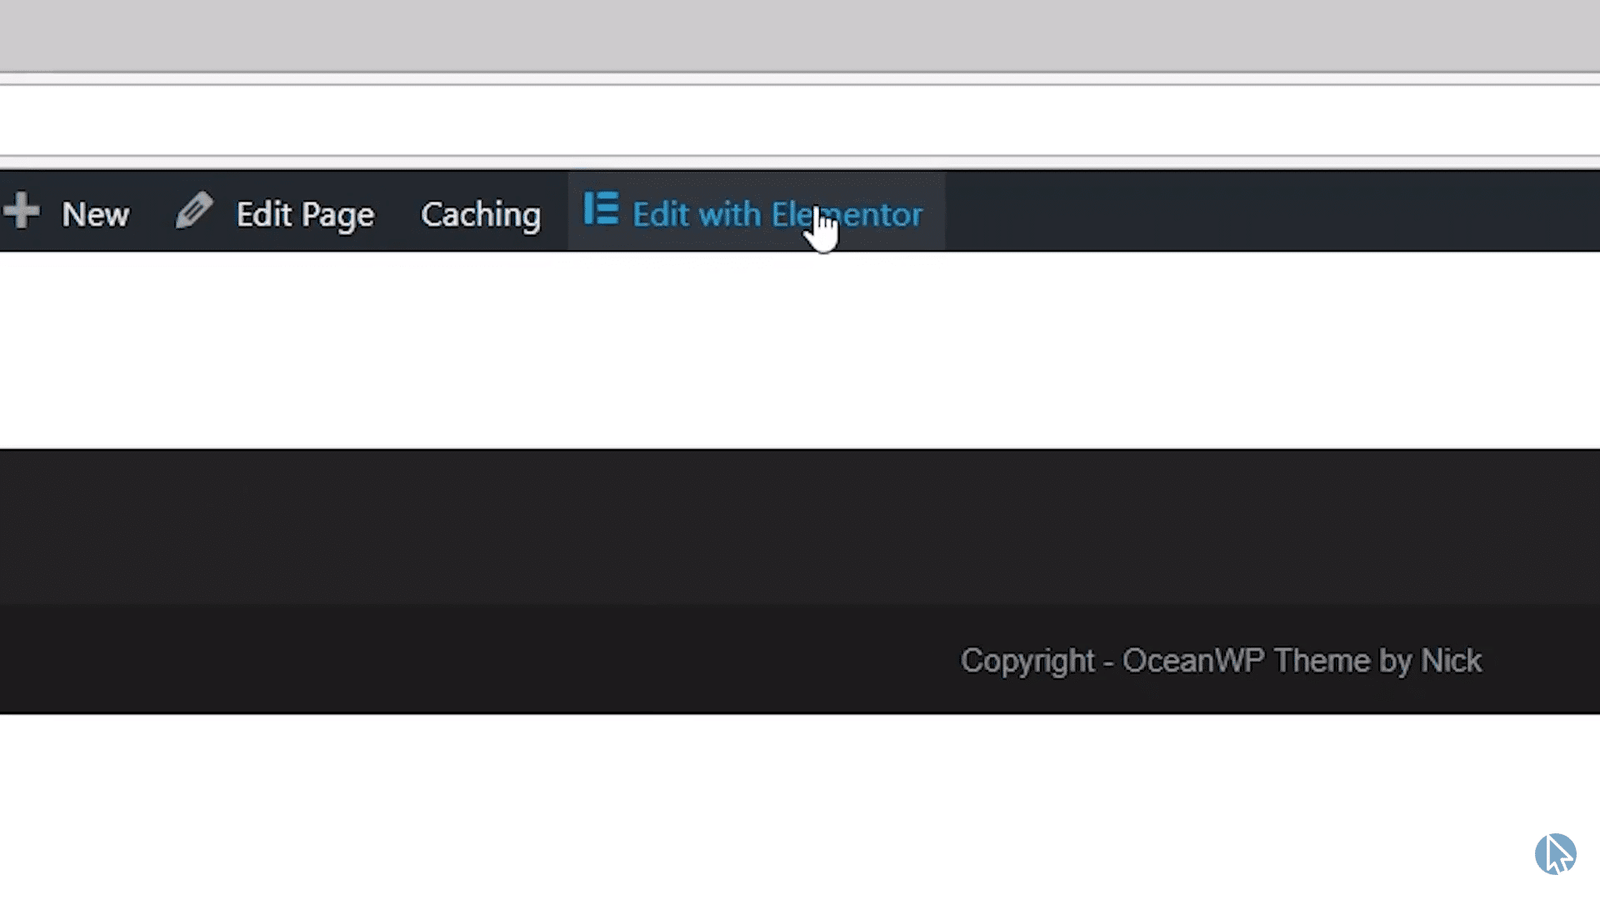
Then go back up to your site name and click “visit site.”
Then click Edit with Elementor.
And now the fun really begins!
This is Elementor, a wonderful drag-and-drop page builder.
You can do a whole bunch of stuff with this.
For example, if you click on the Rubik’s cube thing in the upper right corner of the left side menu, you can add a heading, and change fonts and colors, add buttons and the list goes on.
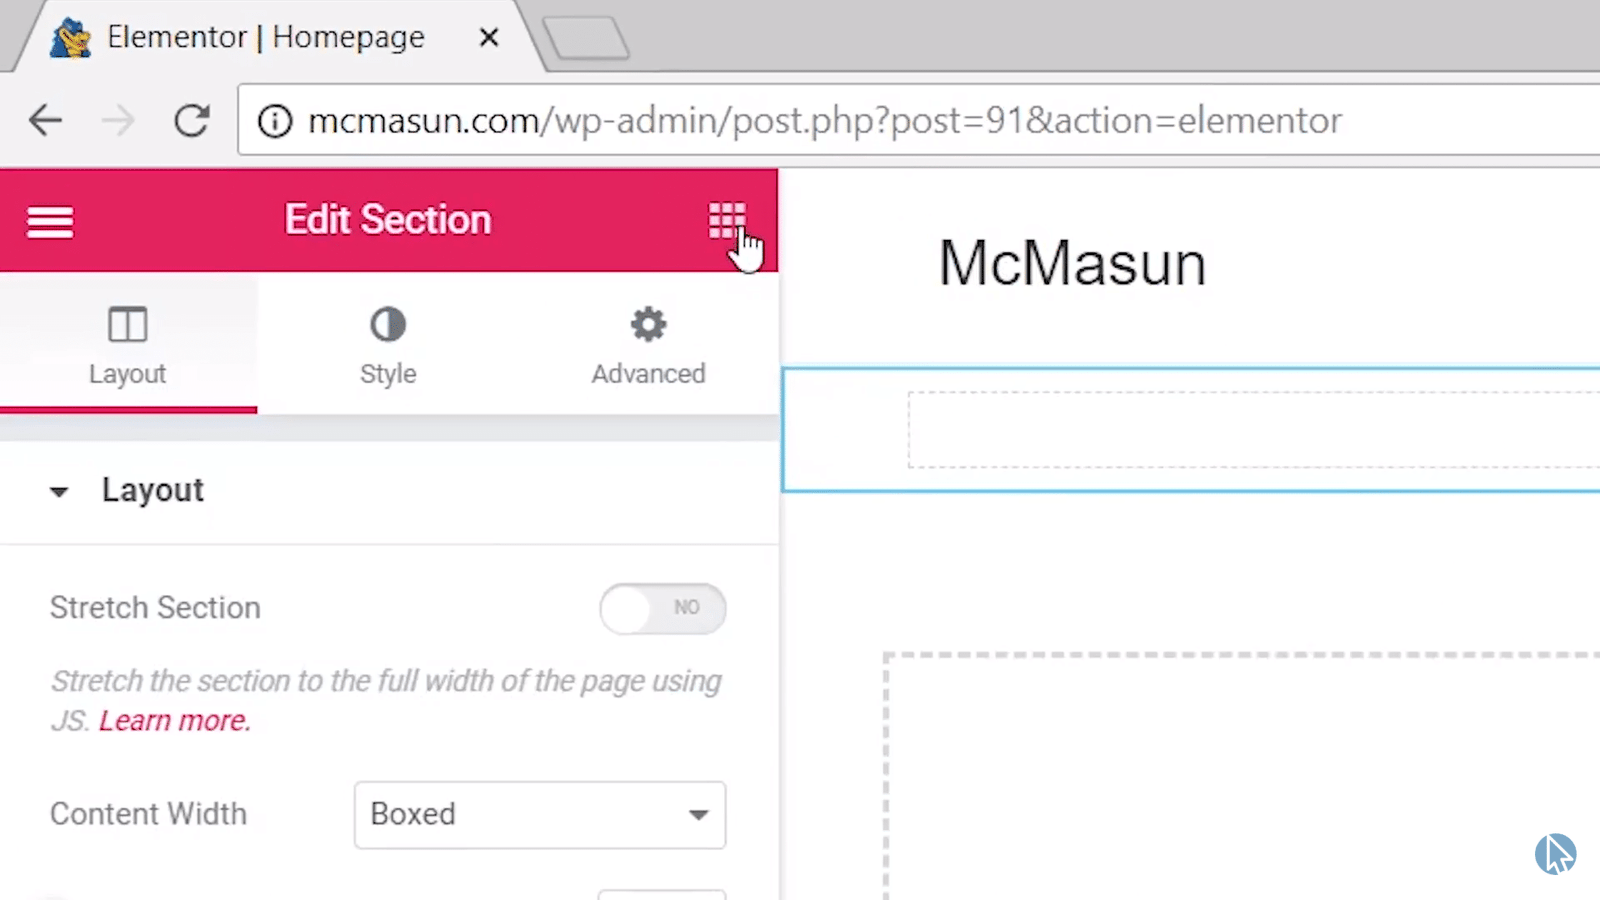
And if you drag elements into the homepage you’ll see a blue line indicating where you will place, inside, above, below, or beside something.
Pretty cool.
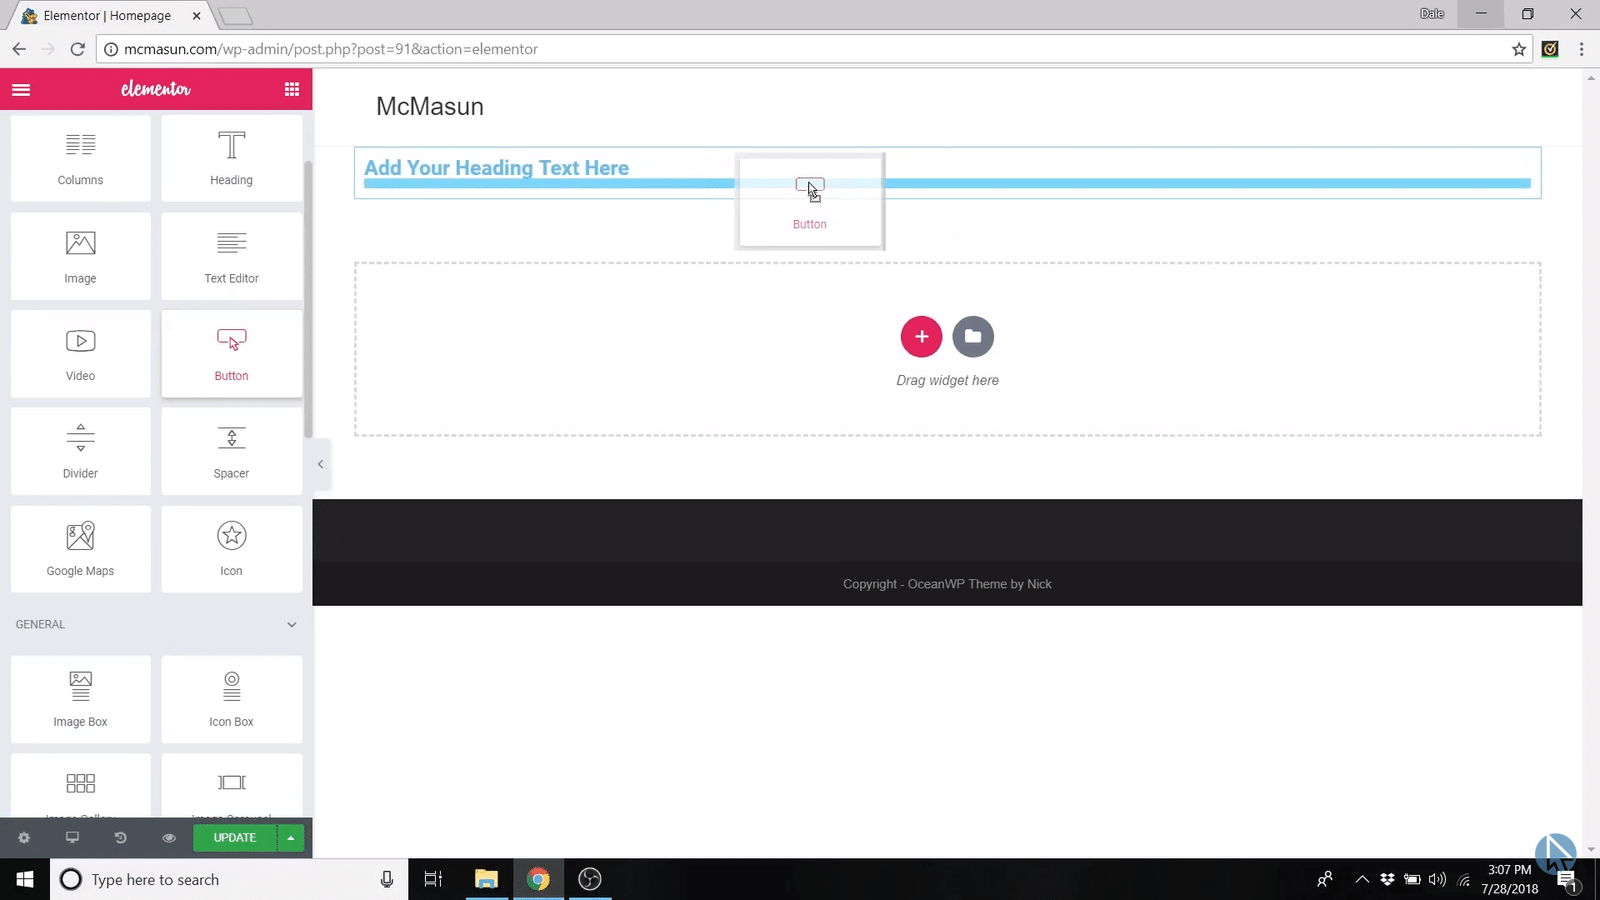
But lucky for you, I have everything pre-built.
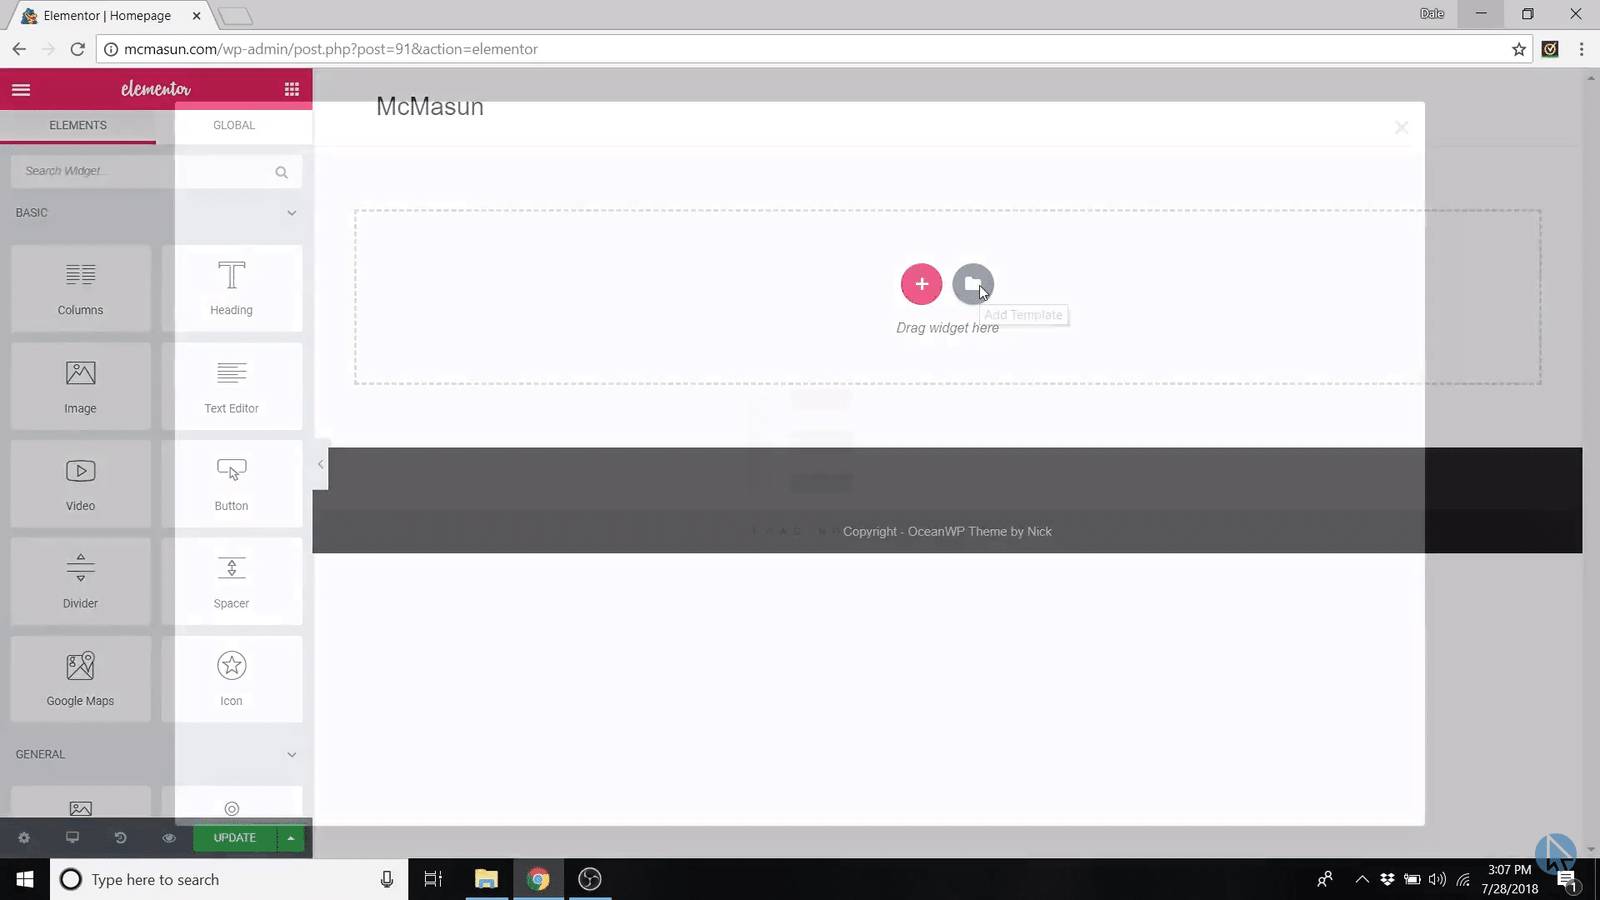
So just click on the folder icon – the add template button.
Then go over to my templates.
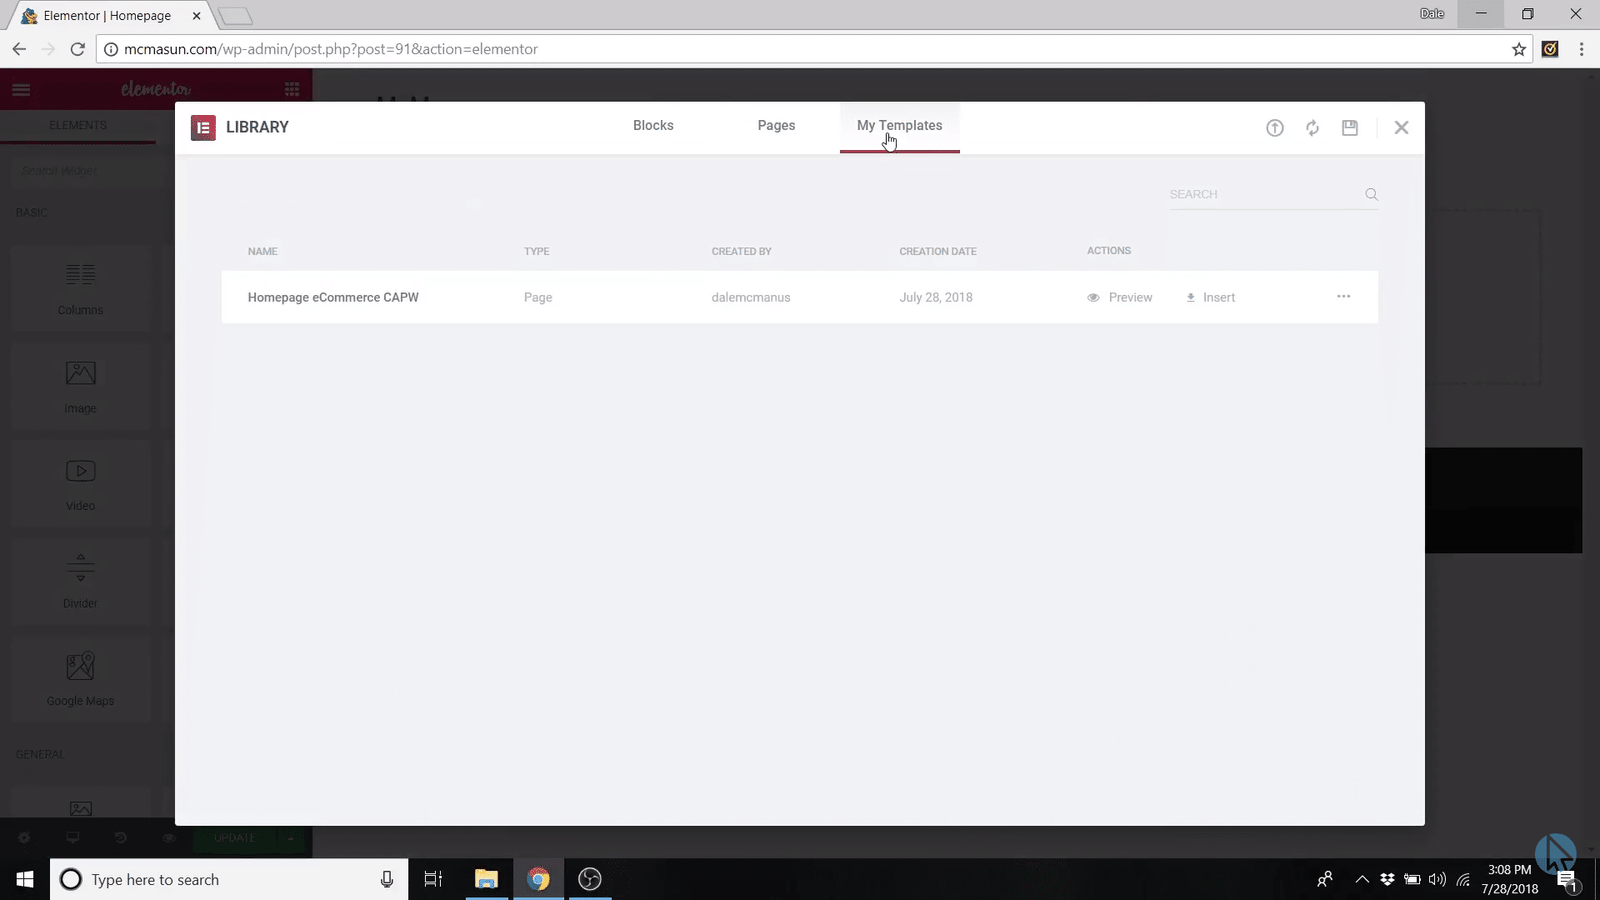
And now you can see the template that we just imported. Click “insert.”
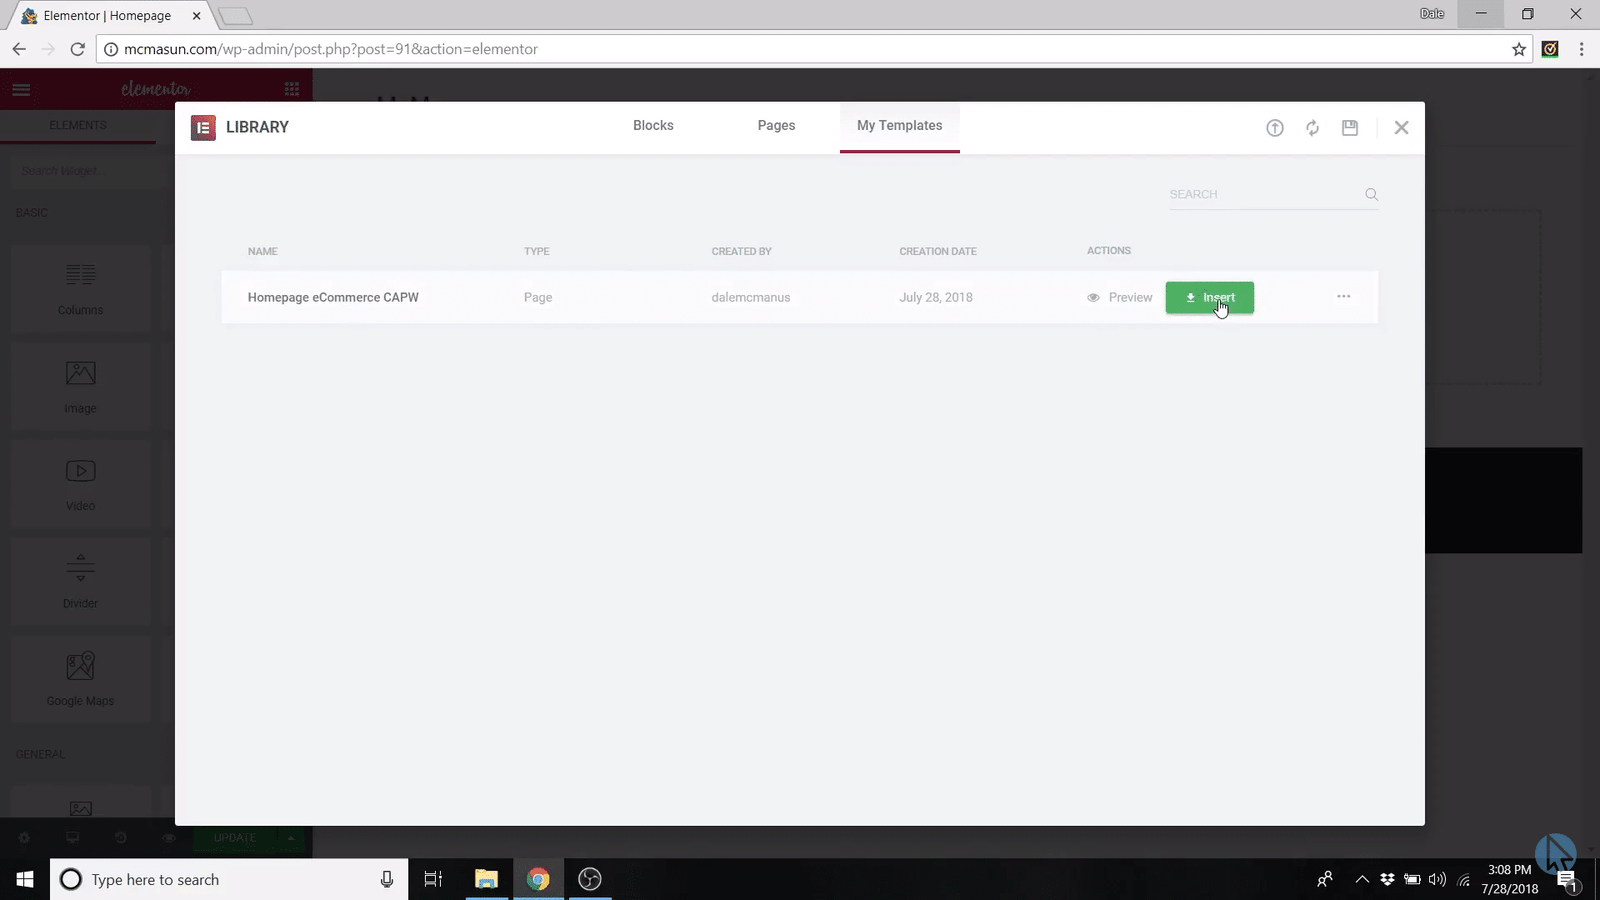
It’ll ask you if you want to import the document settings. Click yes.
And now you’ll see the page I built for you.
There aren’t any pictures on it yet, but I’ll show you how to add those and replace the text buttons and so on.
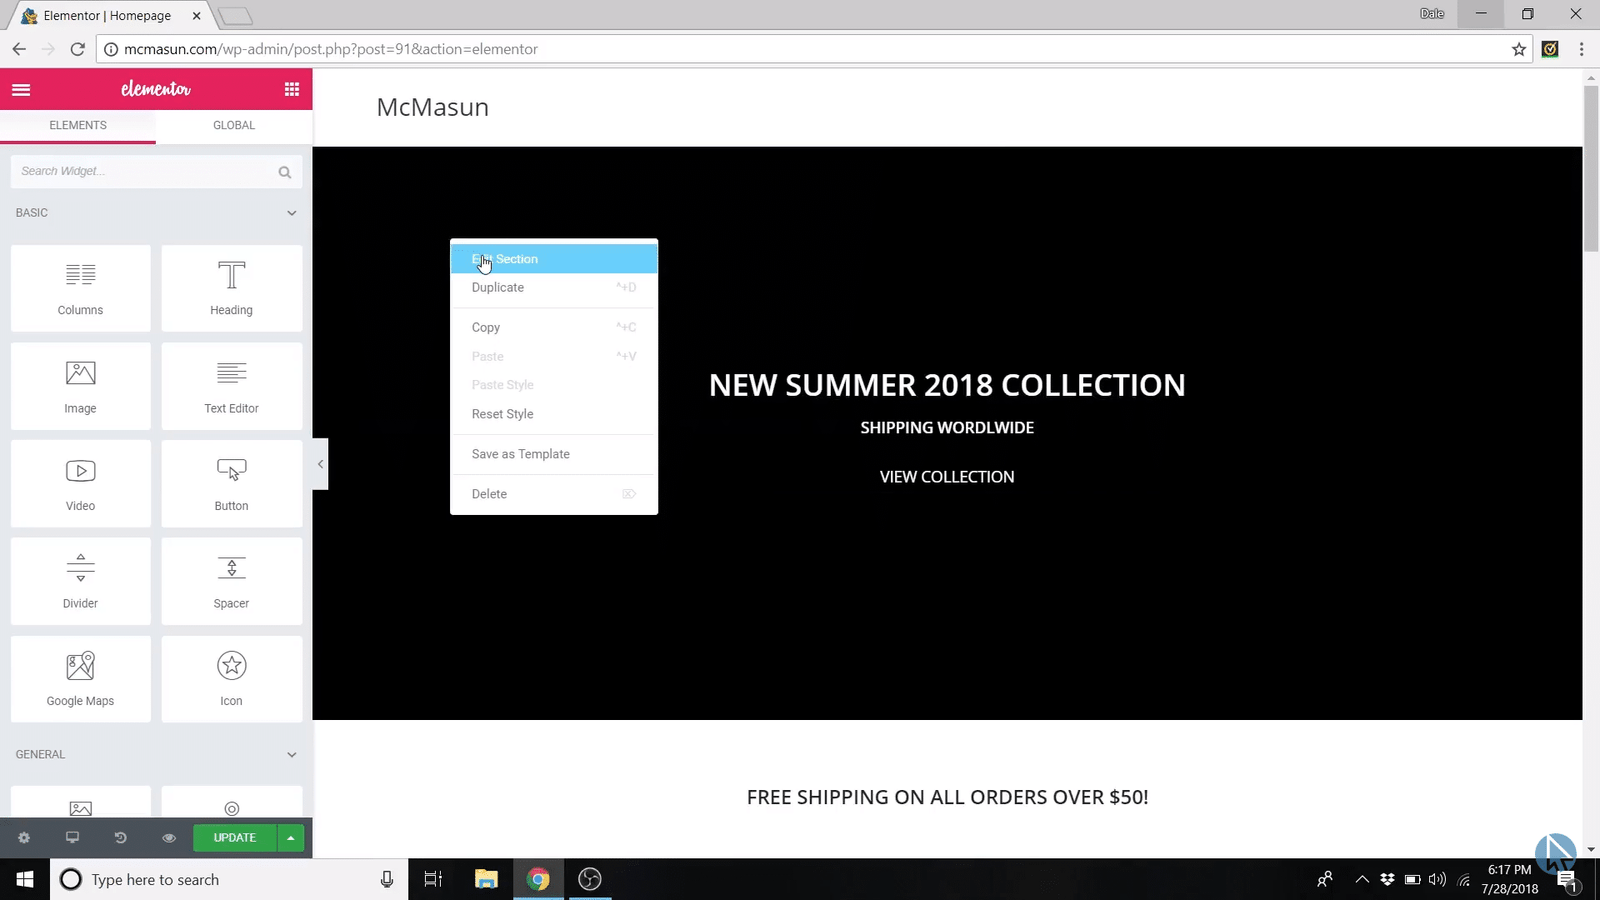
OK, so first, right click inside the main section where the text reads “New Summer 2018 Collection.”
So right click and select Edit Section.
We’re gonna change the background now, so go over to the style tab.
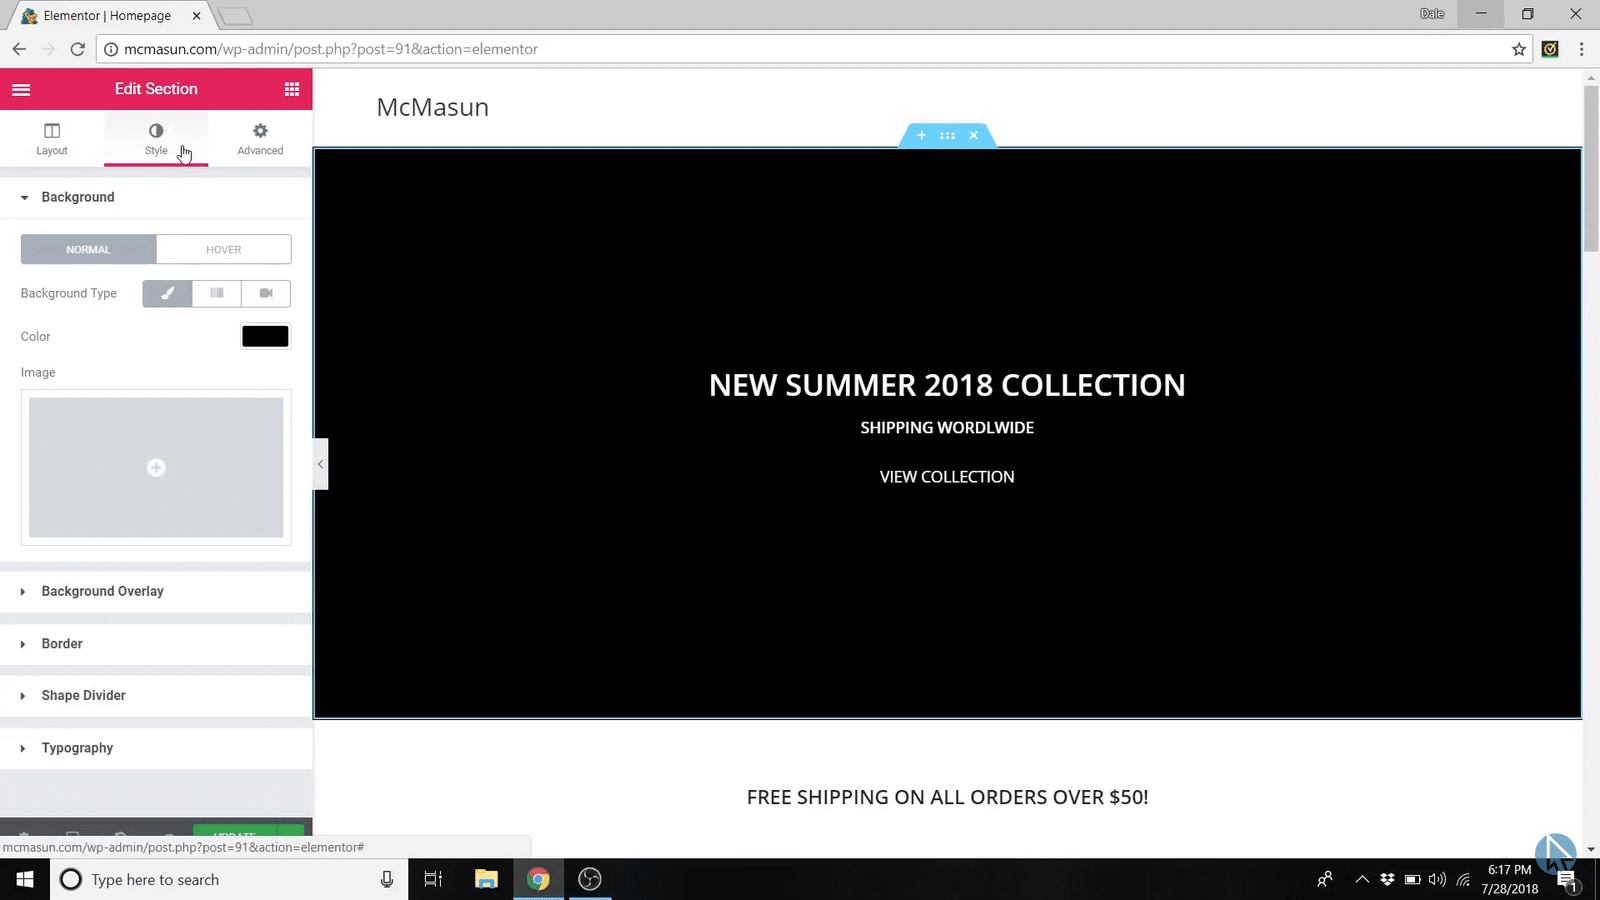
And then open up the Background Overlay.

Now we’re going to add images.
If you want to follow along with the images I use, download them here.
Then click on the plus symbol in here and you can now upload your files.
Click on upload files, then navigate to the follow along images that you just downloaded.
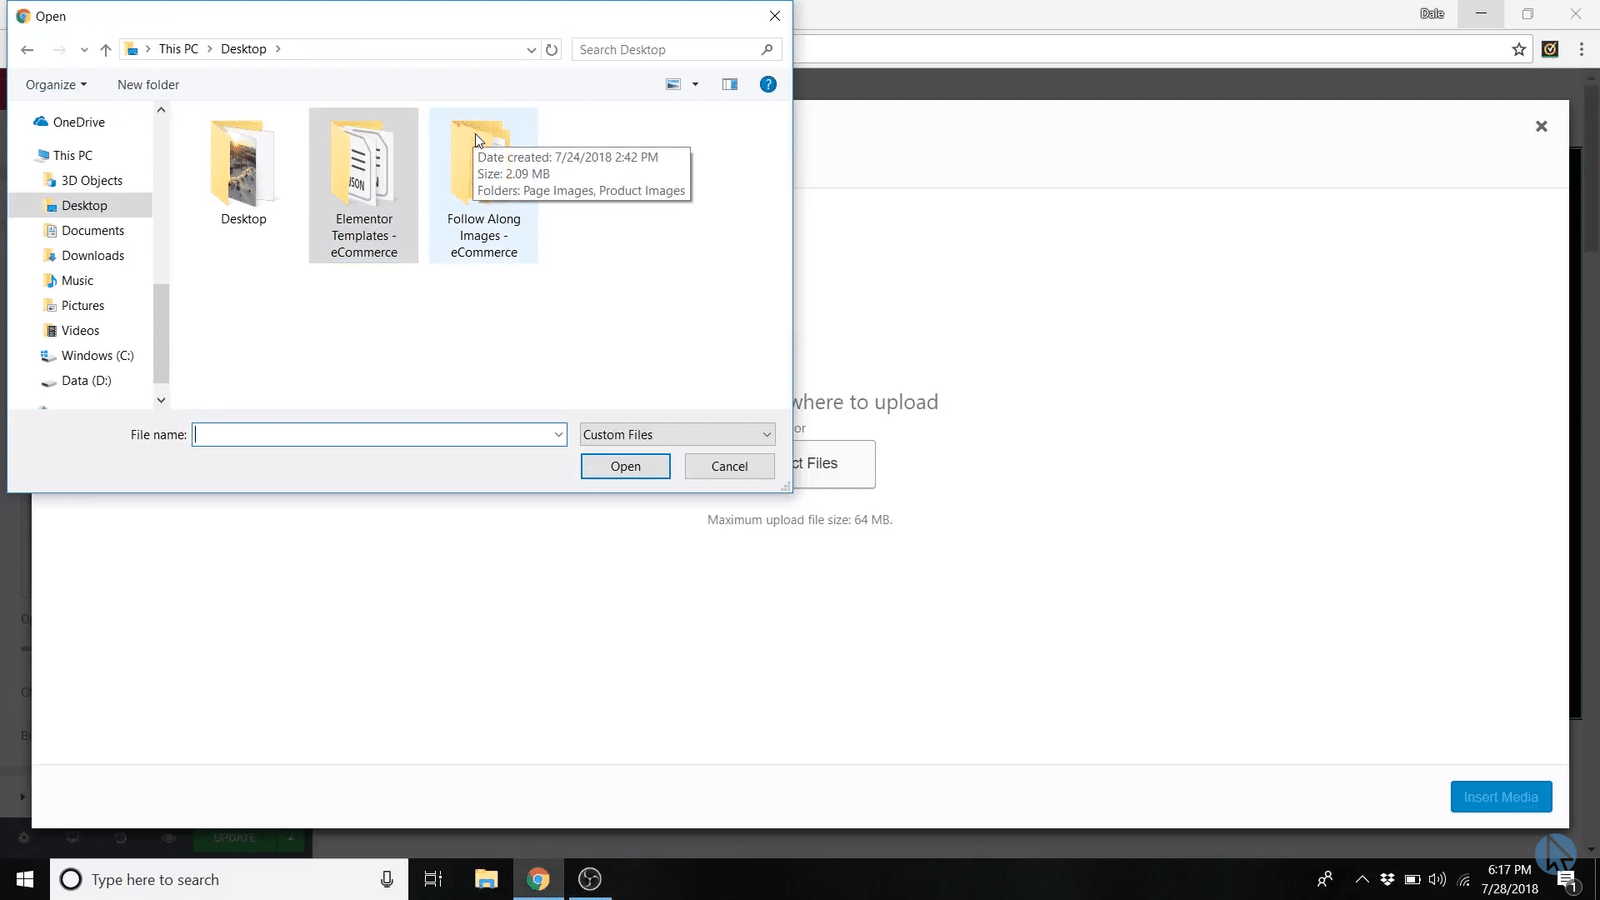
Then go to page images.
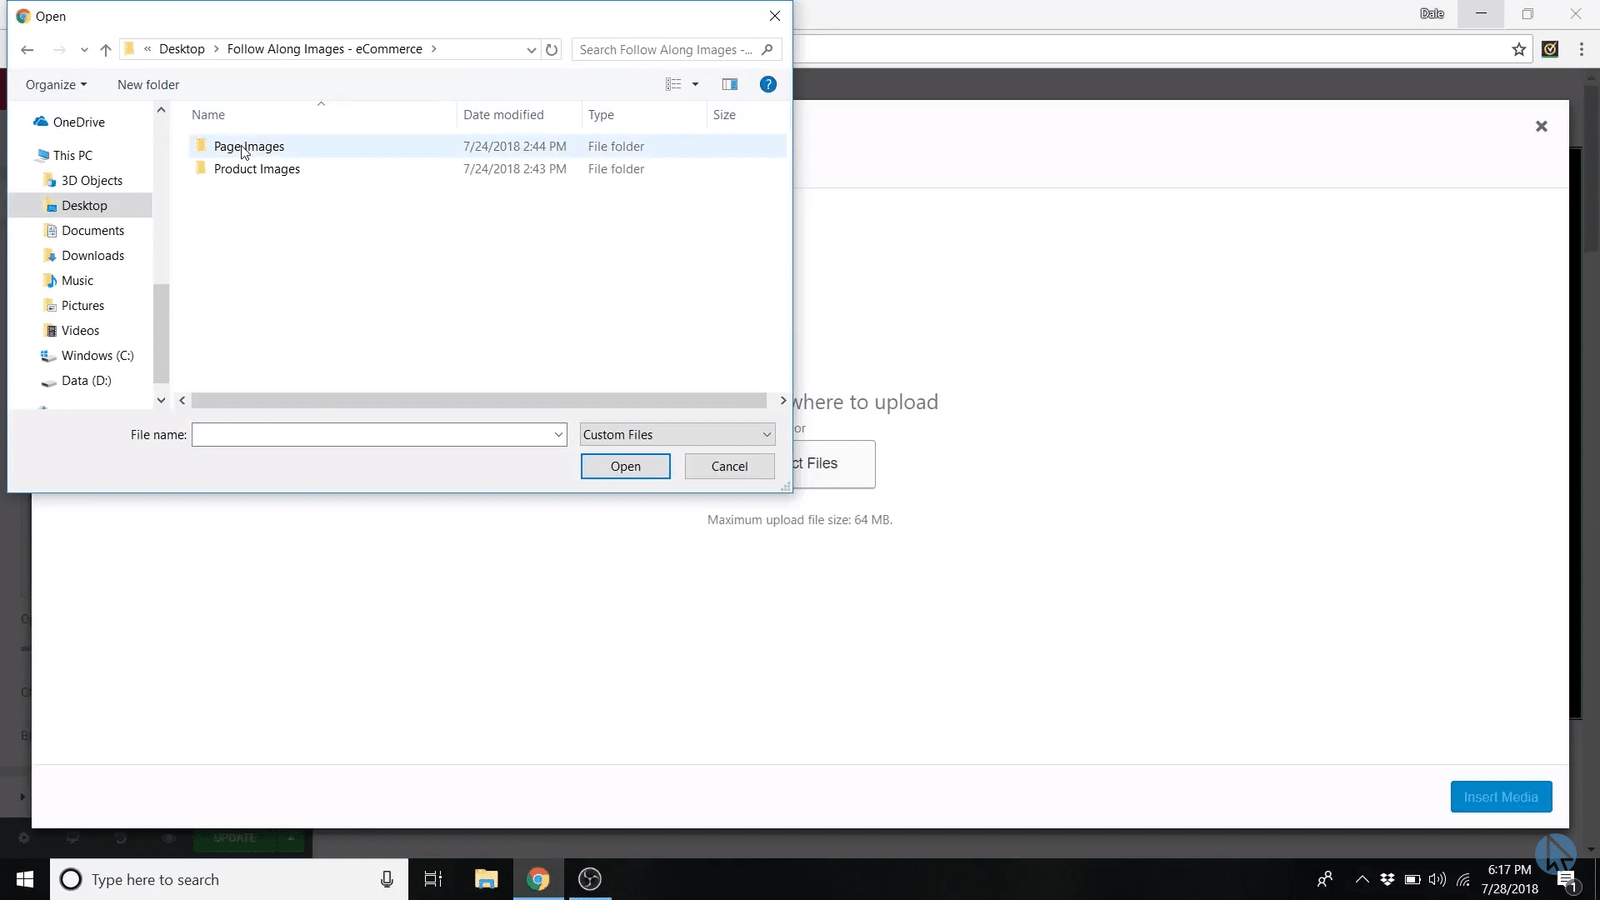
And then choose the Homepage Background image and click open.
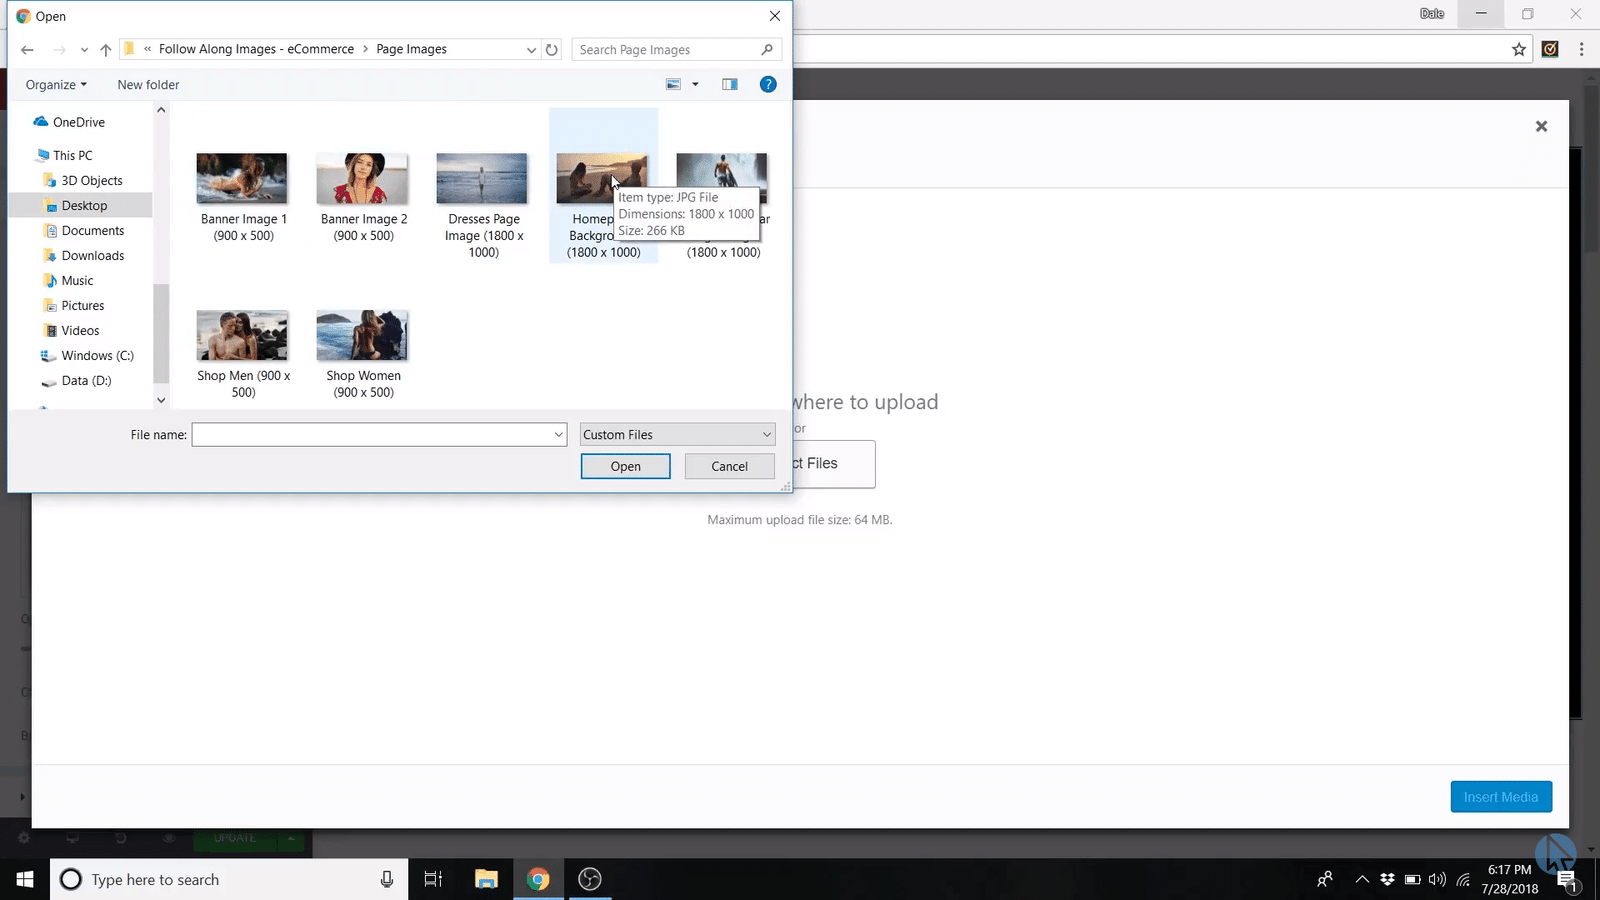
And then you can click “insert media.”
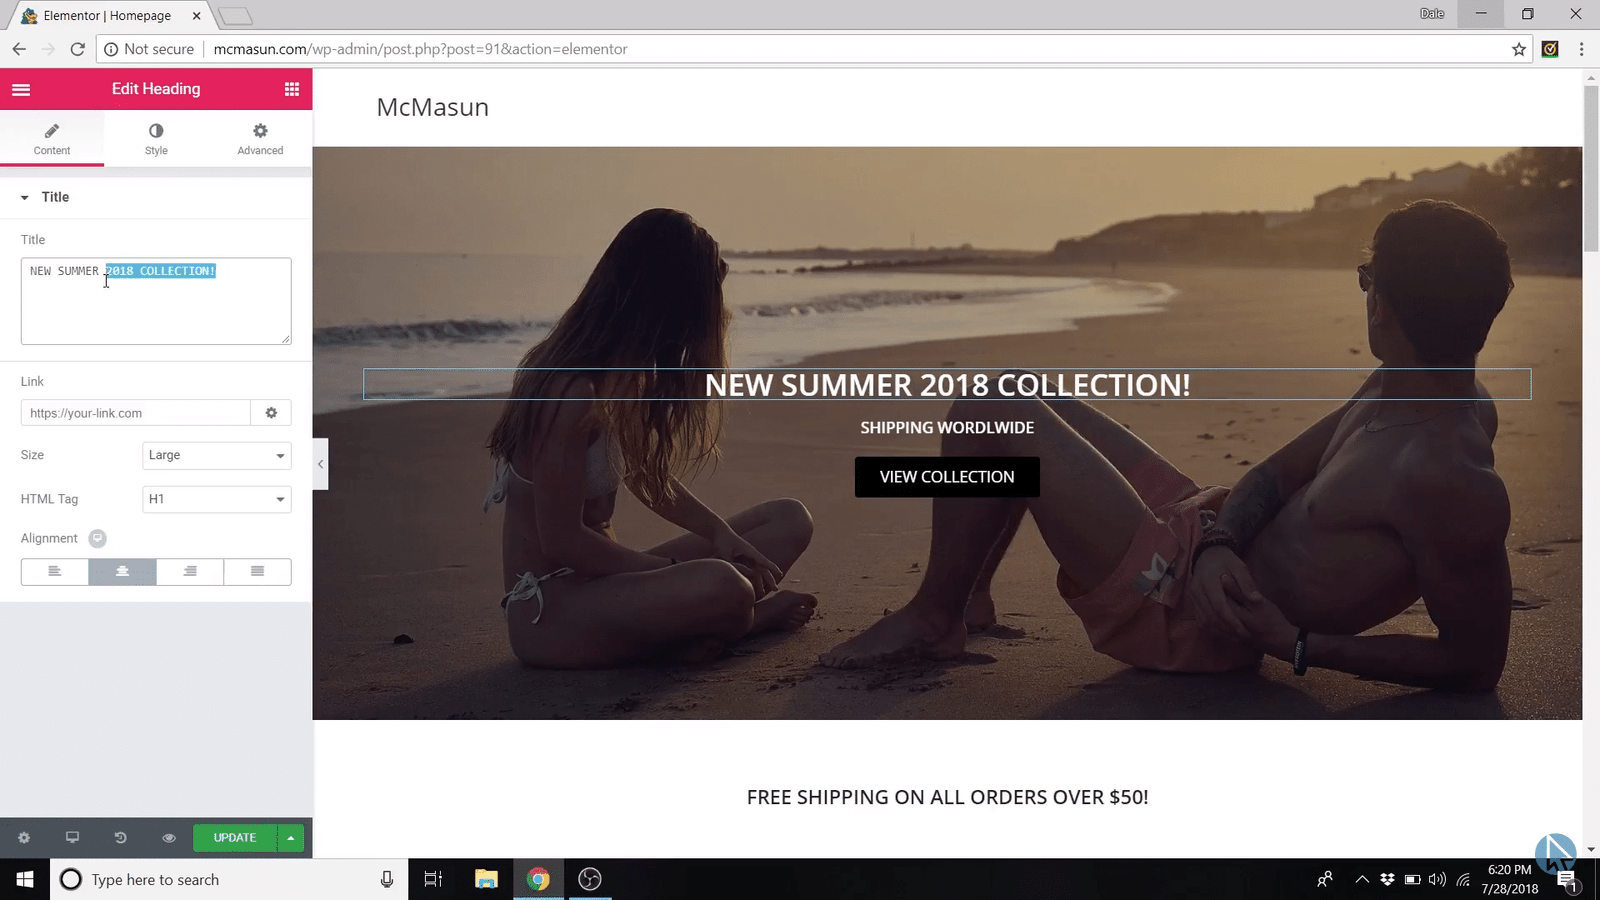
You can even link it if you want to, or change the size of the text.
Then you have the HTML tag.
It’s automatically set to Heading 1.
Heading 1 is the largest heading and it goes all the way down to Heading 6.
If you have the size already set, changing the heading won’t change the size. But if you don’t have the size set, then changing the heading will change the size.
But you should keep it as Heading 1, since it is your main heading. The size can vary depending on how you want it to look.
Now we’re gonna scroll down again and add images to the options for Shop Men and Shop Women.
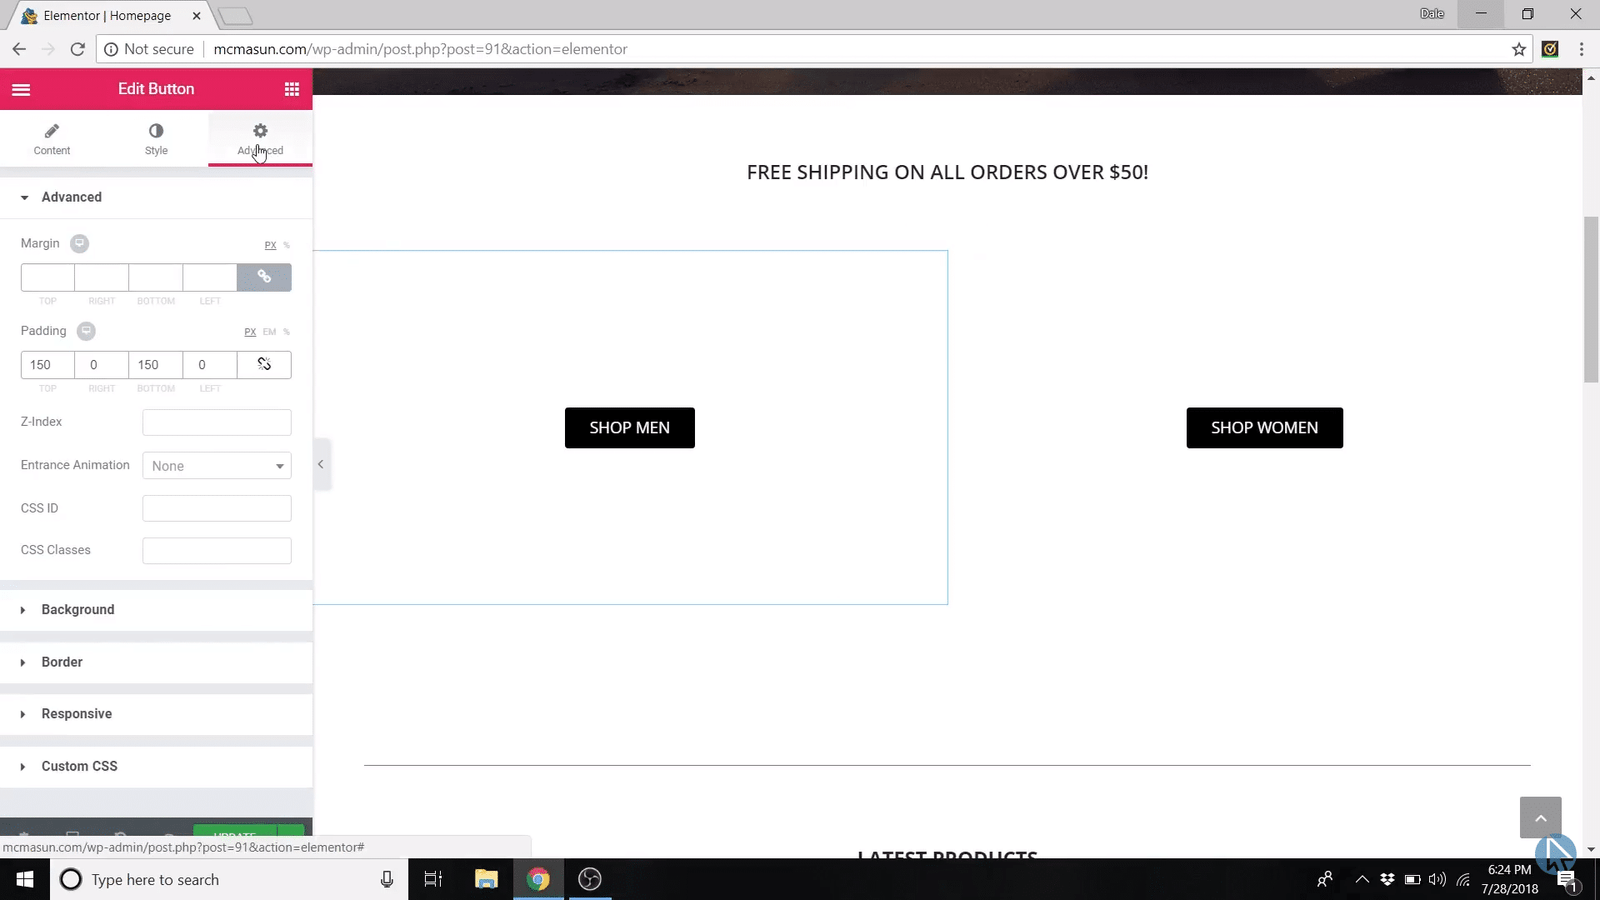
Changing these backgrounds is going to be a little different.
So just right click and select Edit widget.
Then go to the Advanced tab.
Under Advanced you'll see Background. Just Background, not overlay.
Now we’re going to add an image here. Select files and upload the Shop Men photo.
Do the same with the other photo and upload the Shop Women photo.
Edit Banners
The banners are just headings with backgrounds so they work the same as the button.
Just click Edit widget and then go up to “advanced background” and then just put an image in there.
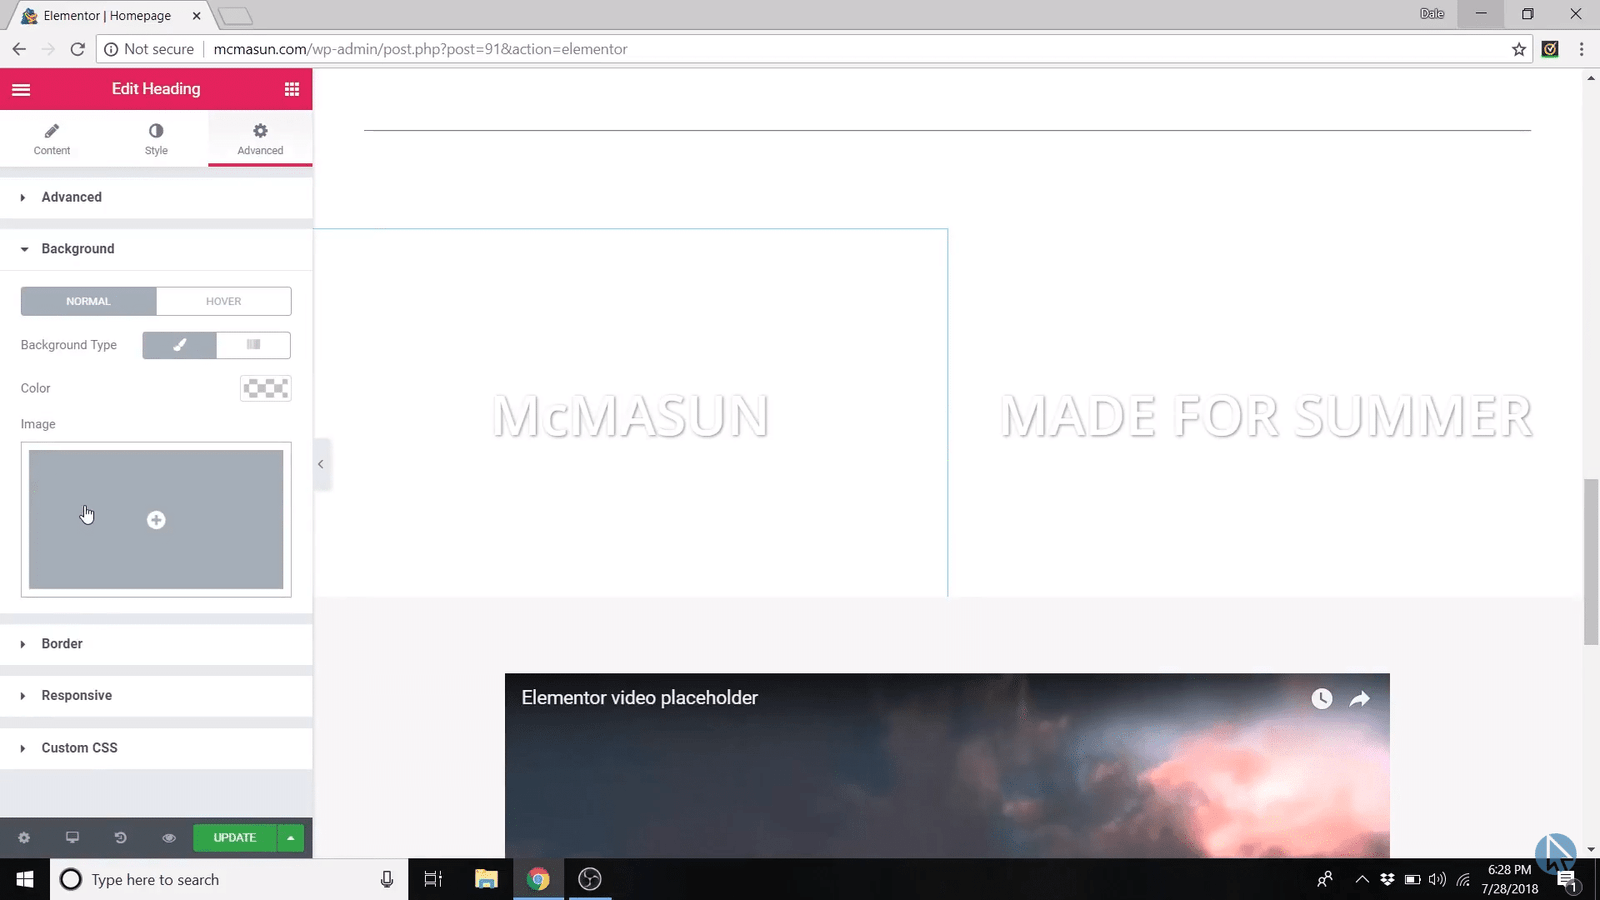
Go ahead and upload Banner Image. Do the same with the other one.
Change Video
Right click on the pen tool.

Select edit widget and you can change the video URL to wherever your video streams from.
Now we’re going to move on to creating product categories so go back to the WordPress dashboard.
Step #8: Create Product Categories
Now we're just gonna click on products and then go to categories.
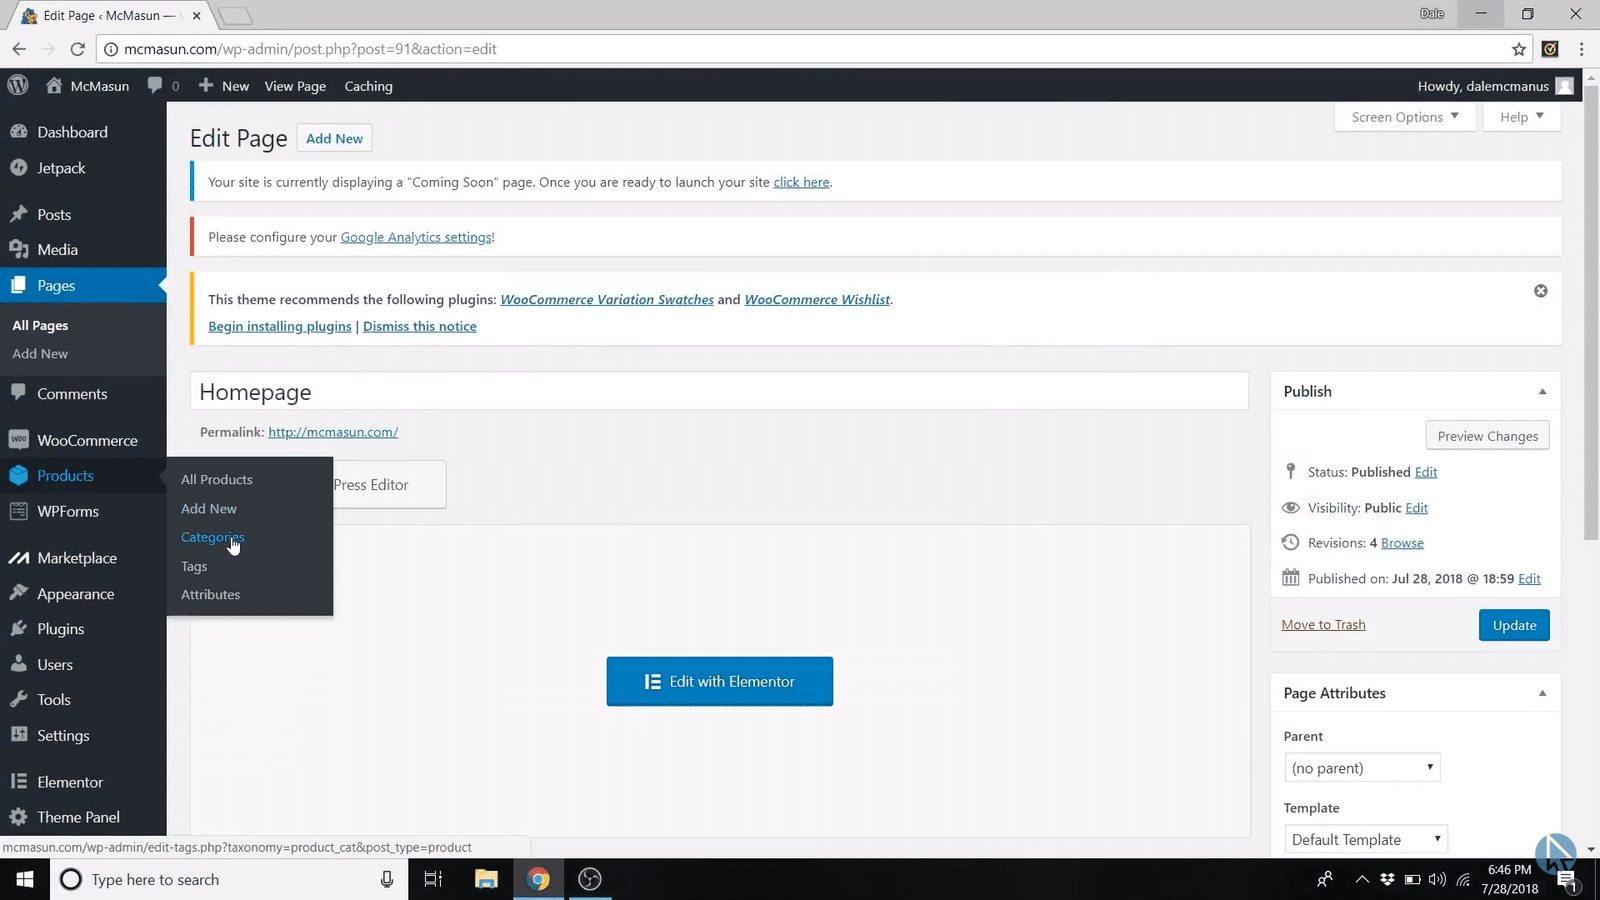
We're going to start with men in the name section and the slug.
So put men and set the parent category as none.
Now go ahead and add the same thumbnail image that we used on the homepage.
Now back to categories and create a category for women, following the same process and using the image used on the homepage for women.
Then add another new category called Products. And for the product image, you can add the image of the bracelet.
Finally, you can create a bunch of subcategories.
Once you’re finished with all that, you can go back to your website and you’ll notice that if you go the Men’s page, for instance, there’s this sidebar. You want to get rid of this.

Just go up to customize and scroll down to WooCommerce and click on Archives and change the layout to full width.
Step #9: Build Header and Footer Menu
We’ll start with the header.
Just go up to your website title and go to “visit site” and instead of editing with Elementor we’ll click the customize tab.
So first we're going to click on Header, and go to General, then to Style, and change it to medium.
Then scroll down and you'll see elements positioning and we're gonna change it to “logo first” and then social buttons and then search form.
You can change the padding to 10, 10, which I recommend.
Then go back and go down to Menus and create a new Menu. You can call it the Primary menu or Header menu.
And just go down and check main.
Next and we're gonna add some items to this.
So just click the add items button.
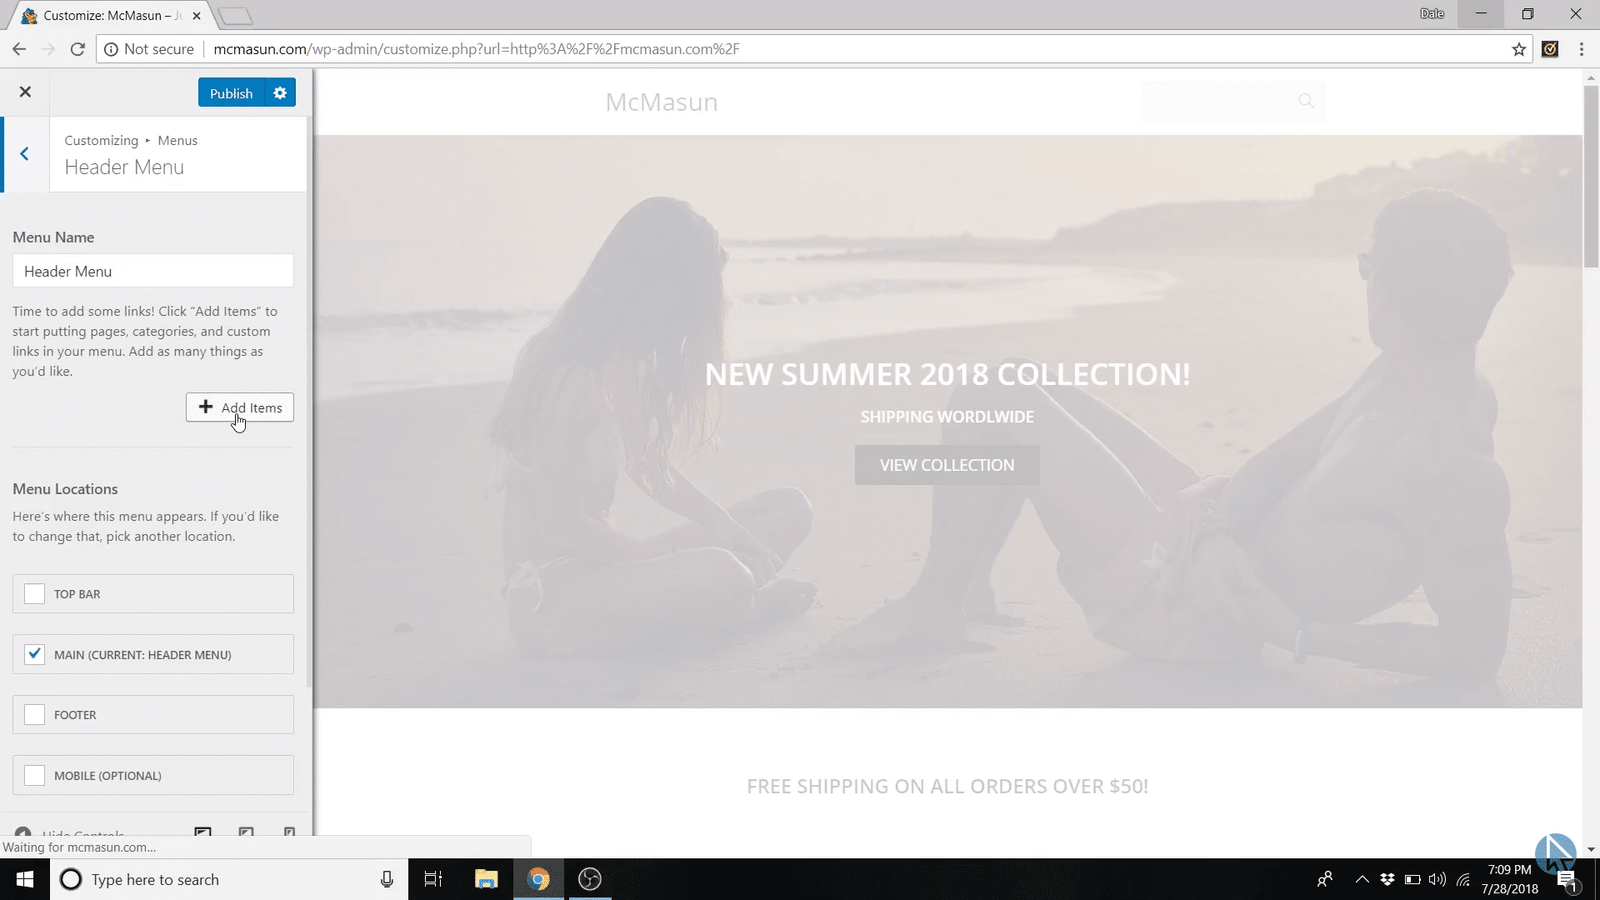
Then search for your product categories.
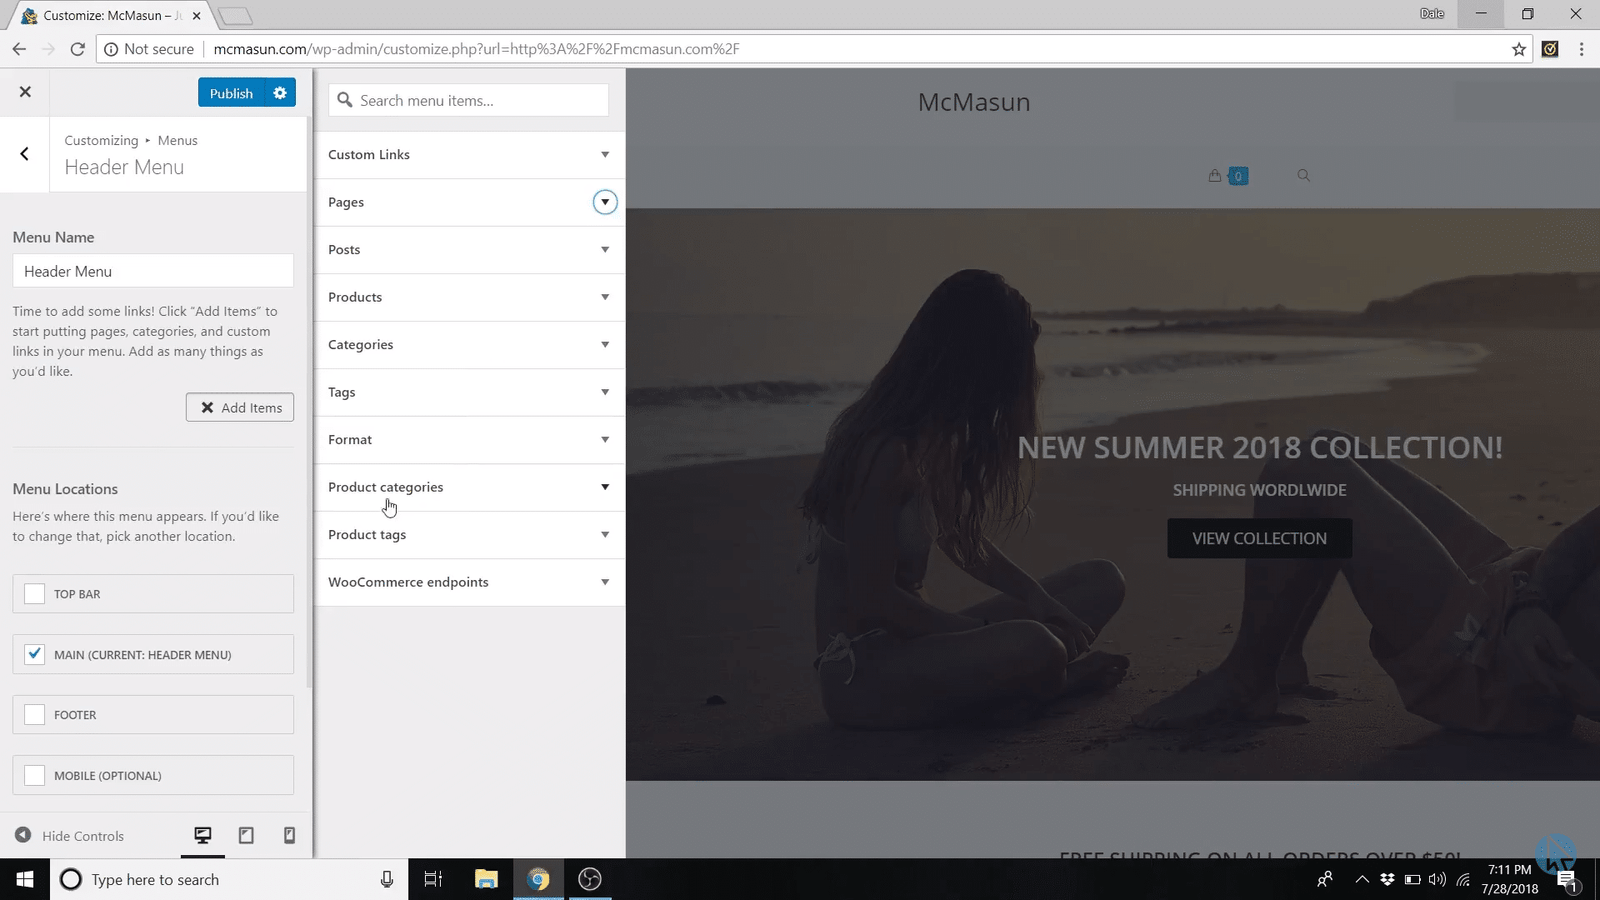
Then add men, women, accessories and then all of our subcategories.
After that, close that section and go up to pages and we're gonna add my account.
So go back to the Dashboard and scroll down to Appearance and Menus.
And then restructure these by dragging and dropping them.
Then save the menu.
Next, I’m going to show you how to make a logo and put that on the header as well as your site identity.
In order to do this just go to a new tab and head over to logomakr.com.
You can browse by all these different categories of logos and it gives you just almost an endless page of good simple logos. You can also type in any sort of keyword for whatever you're looking for.
I chose a square mountain wave symbol, and you can resize it by going up to one of the corners and drag to resize.
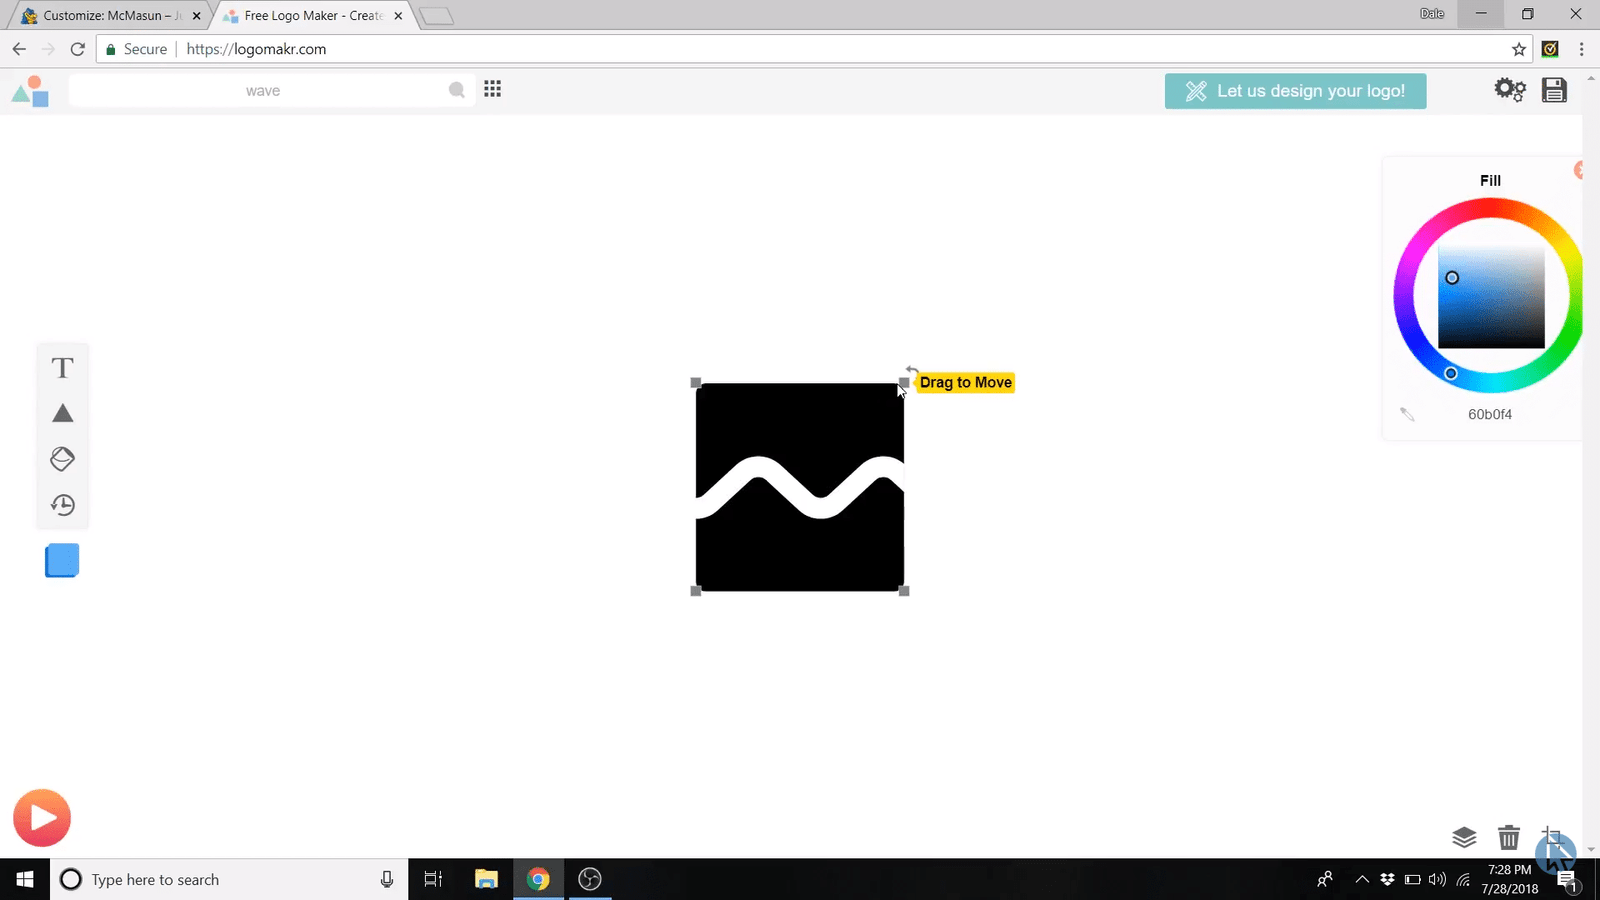
I also added some text by clicking on the T symbol and writing Mcmasun.

Once you’re finished designing the logo, you can save it and you’ll be presented with 2 options.
One where you can buy it as a vector file, which is super high quality. And two, where it’s free but you have to give logomakr credit.
After downloading it, go back to your site and go to Customize and then to Logo and add the image.
All right, now it's time to set up our footer.
Create the Footer
Go ahead and download the footer that I created for you if you haven’t already.
And go back to the Dashboard and down to Elementor and My Templates.
Then import a new template and choose the Footer.
From here, we're just gonna scroll down and go to theme panel and then go over to my library.
Click Add New.
I just labeled it “create a pro website footer.”
Then make the content layout 100% and “save draft” or “publish” it.
Now go to Edit with Elementor.
From here click “add template” and import the document settings. Then click publish.
Now visit your site and go to customize, scrolling down to Footer Widgets.
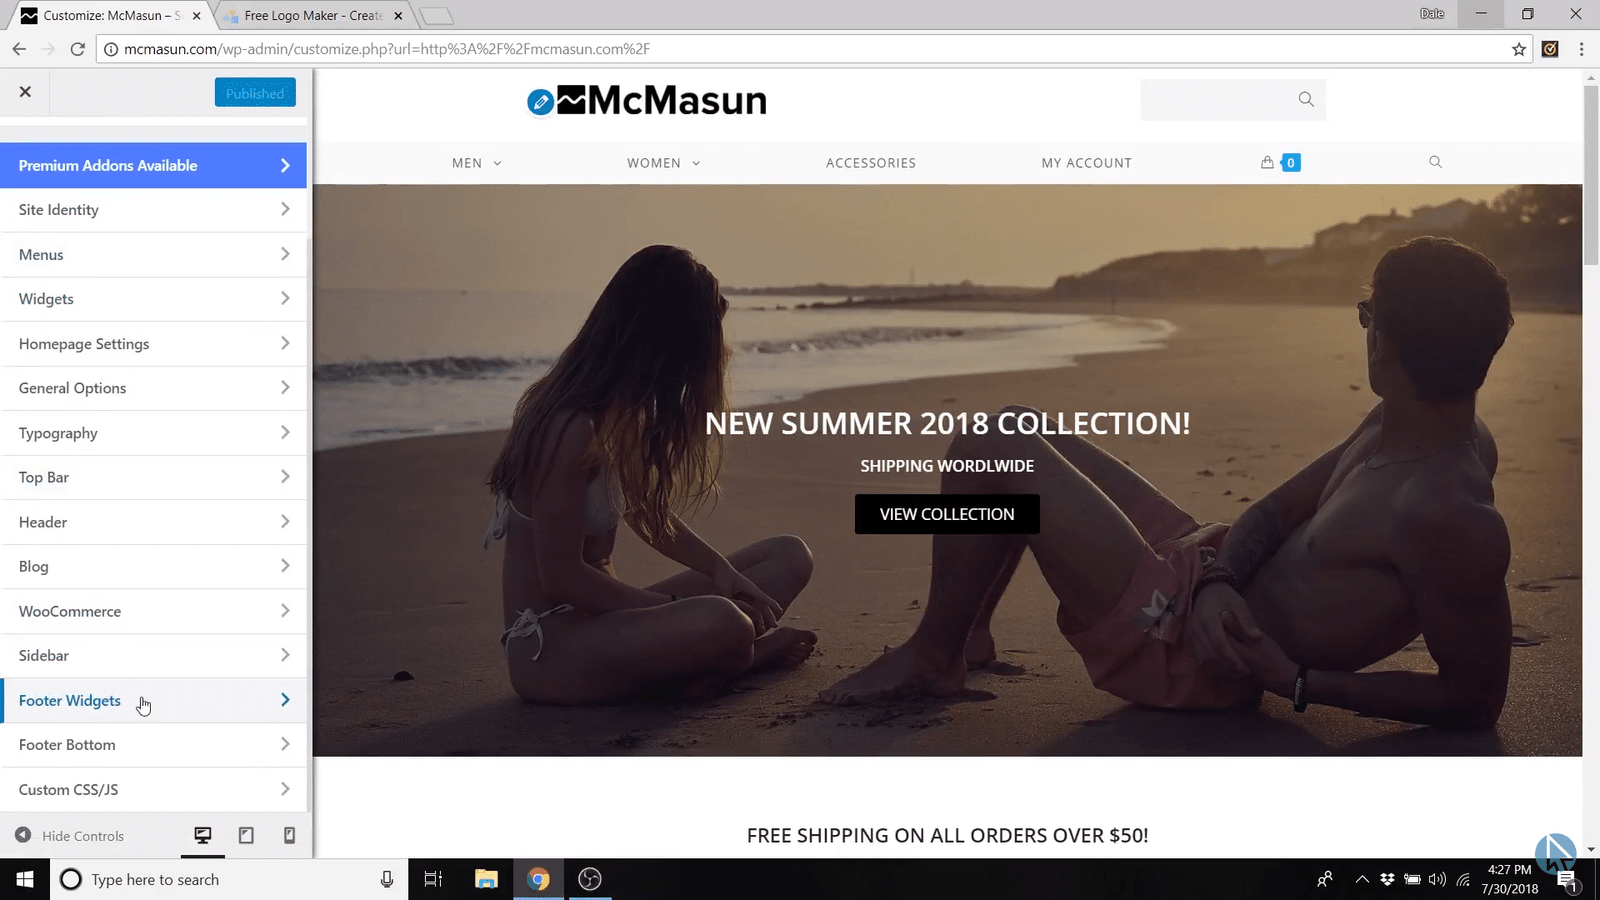
Click select template and go to see APW footer.
To make the footer fit perfectly, uncheck “add container” and change the padding to zero. cool so now if we go
Step #10: Create Products
Now comes the part you’ve probably been waiting for.
The first thing to do to create products is go back to the dashboard, then to Products and Add New.
You can make 2 types of products:
- A simple product (which you’ll make more often).
- And a variable product (like a shirt with 3 different colors).
We’ll dive into each below.
Create a Simple Product
Here we’re gonna make a black and white bracelet.
Scroll down and you'll see a section called Product data.
Make sure you're on “simple product.”
And for this, I’ll say it costs $24 but it’s on sale for $19. It’ll actually X-out the regular price and show the sale price.
Feel free to play around with the other sections like weight and dimensions. Moving on over to product image, we're going to upload the image of the black and white bracelet.
You can also add product tags, which lets people type in words in the search bar and find this bracelet. You could add as many as you'd like.
Then add it to three important categories: Men, Women, and Accessories. Then publish it.
Create a Variable Product
Go ahead and add a new product.
We’ll call it Baseball Tee.
Make sure to change Product data to a variable product instead of a simple product.
Now you can set the price depending on the attributes of the product.
Go to Attributes and add a new attribute and name it Size. And in the Values section, you can add size like this:
Small|Medium|Large, and so on. Make sure to use the “|” symbol to separate values.
Then we’ll also add color as an attribute with red|blue|green values.
Now just click on save attributes.
And then just head on over to variations and we're just going to add a new variation.
Go over to create variations from all attributes and then click on go.
So now you can set all the information for each variation, including price and an image. Go ahead and save the variations and then set the main Product Image.
When creating categories, it’s important to add it to the Shirts category because it is a shirt, but you should also add it to the main category shirts falls under, like Men or Women.
Then hit publish.
Now there are a few last things we need to do to make it look good on your website.
Go to OceanWP settings and then Content Layout and change it to just Full Width.
And in order to get the different colors to show up, we need to set a product gallery.
So right below Product image is Product gallery. All you have to do is select the other colors of products you’ll be selling. Hold Ctrl when selecting products to select more than one at a time.
Create a Grouped Product
Add a new product and let’s just say our grouped product would be an entire collection of shirts, so we'll call it the summer collection. Again, make sure that your settings are on full width, and then change this to a grouped product.
And then you have all the same values as the other products. Pretty simple.
Publish this page and we’ll add the affiliate link.
Create an Affiliate Product
Add a new product and we’ll call it Hostgator Web Hosting (which I actually do sell as an affiliate).
Then scroll down to Product data and change it to External/Affiliate product. You can add in your affiliate link into the Product URL.
Step #11: Publish Your Website
Whenever you're ready to finally publish on any page, you’ll see the following message that I highlighted below:
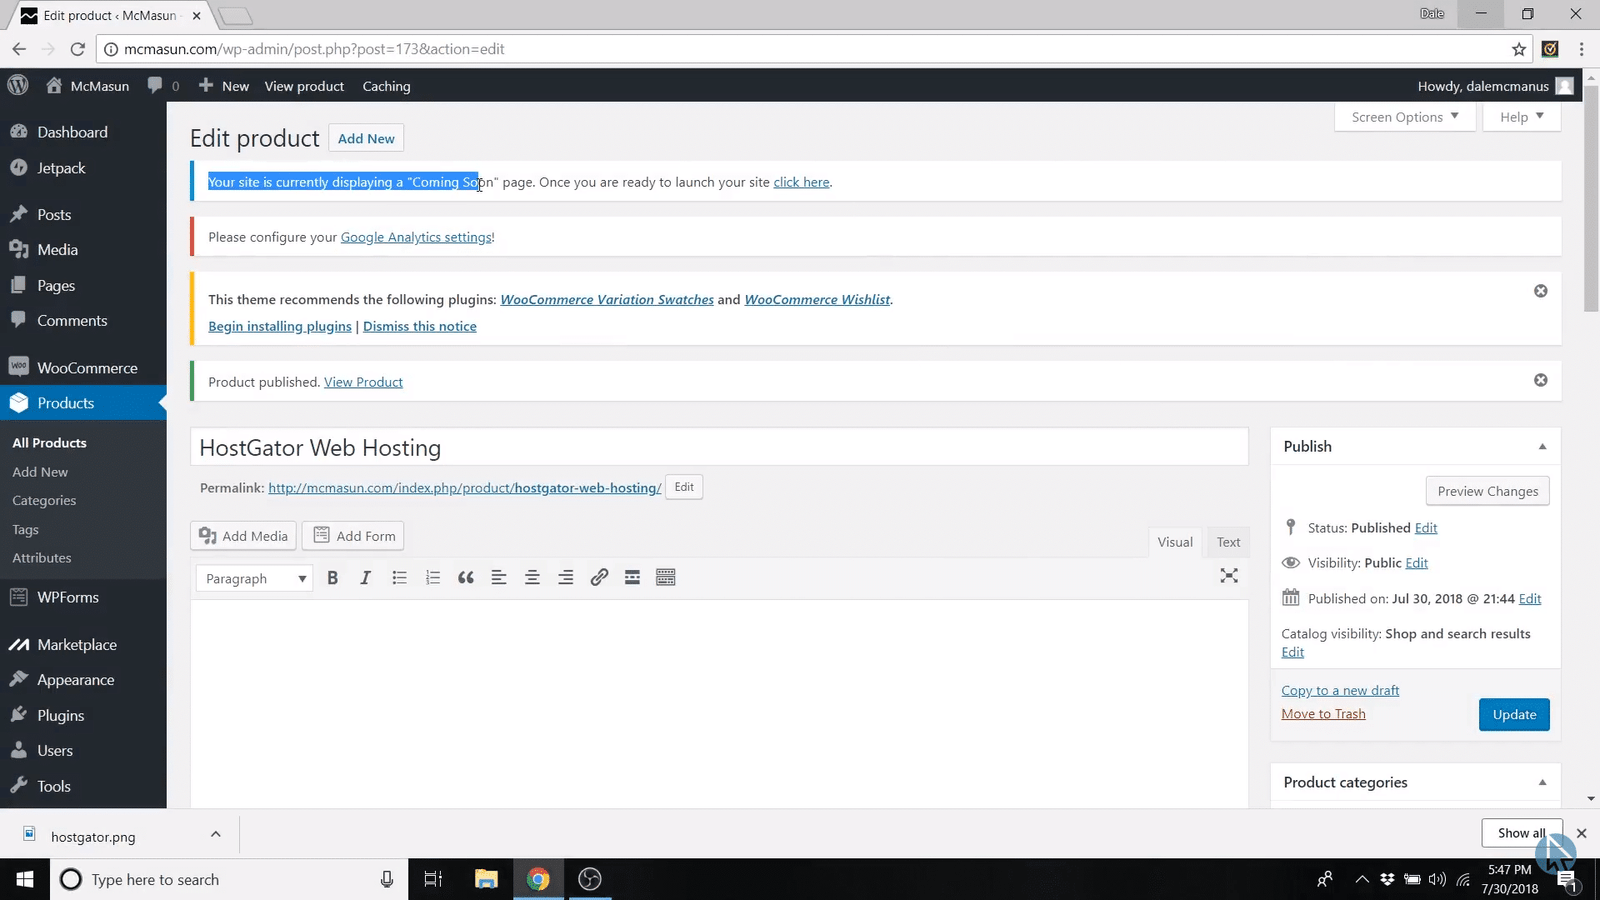
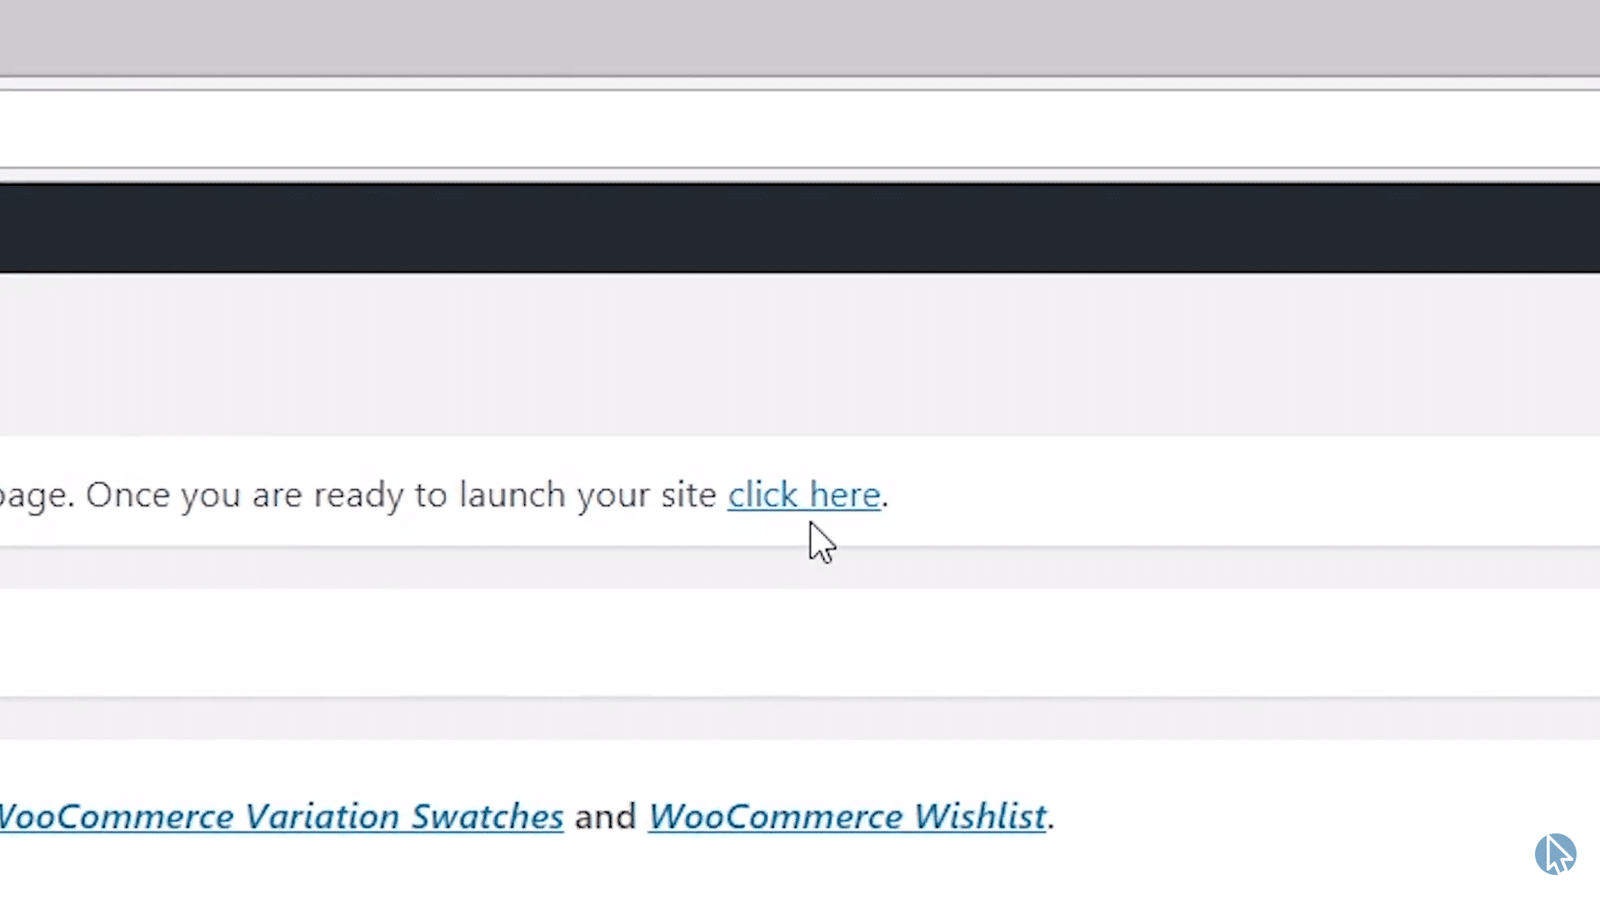
All you have to do is click “Click Here.”
And that’s how to make a complete ecommerce website!
Thank you guys for sticking around through the whole tutorial. I know it was a long one.
If you found this tutorial helpful be sure to check out our other written guides filled with all sorts of helpful website tips and tricks to help you launch your website!





I’m not seeing the template you are talking about in your video that you mentioned you provided. Where can I find that?
Grab that here!
Love the tutorial although there are some slight differences in menus in the dashboard – probably because it’s 2 years old. There is a problem though in that I cannot get the categories to appear in the top menu as they do in the tutorial. I have ‘Shop’ there instead. I haven’t added products yet.
Hey Spyro! Not exactly sure what’s going on since I don’t know your particular setup but you should still be able to add category pages as sub-items from the “Menu” page in the dashboard!
Hi Dale,
I’m Lannie and I used your video on youtube on How to Make a WordPress Website with Elementor. I am really happy with how my website turned out (kauaihomephotography.com). I signed up with hostgator for SEO help so I’m more findable. Also asking clients to leave me google reviews as well. Moving forward to my next project.
Now I’m ready to make a website to sell my art work. I have a Shopify website (30$ a month) with my art on it but get hardly any traffic. So I was going to build one with your help again. I have a few art store fronts that want to charge a lot to make an art selling site, as well take a cut of your sales and run your store. In starting watching your Step-By-Step Woocommerce Tutorial | Create an eCommerce Store 2020 video would this work well for selling my art? You also mentioned that you may offer 2 hour website coaching with Dale, is that an option?
Hey Lannie, glad our Elementor video helped you out!!
You can definitely sell your artwork on a Shopify site – sent you an email about that website coaching 🙂